How to Clean Electric Shaver: The 2026 Ultimate Guide to a Perfect Shave
Published in May 12 2026
Is your electric shaver pulling at your beard instead of gliding smoothly? Does your skin feel irritated or red after a shave? The problem isn't your shaver; it's how you maintain it.
A dirty shaver head is the number one cause of a poor shave and skin issues. This guide will teach you everything about how to clean electric shaver units, from basic rinsing to deep cleaning. We'll cover foil and rotary models, sensitive skin solutions, and even specific device care.
But before we dive into the methods, let's talk about the tools that make it all possible. For top-tier performance, the Braun Series 9 Pro+ offers unmatched comfort and closeness. For those battling sensitive skin, the Panasonic ARC5 is a game-changer with its gentle yet effective foils.
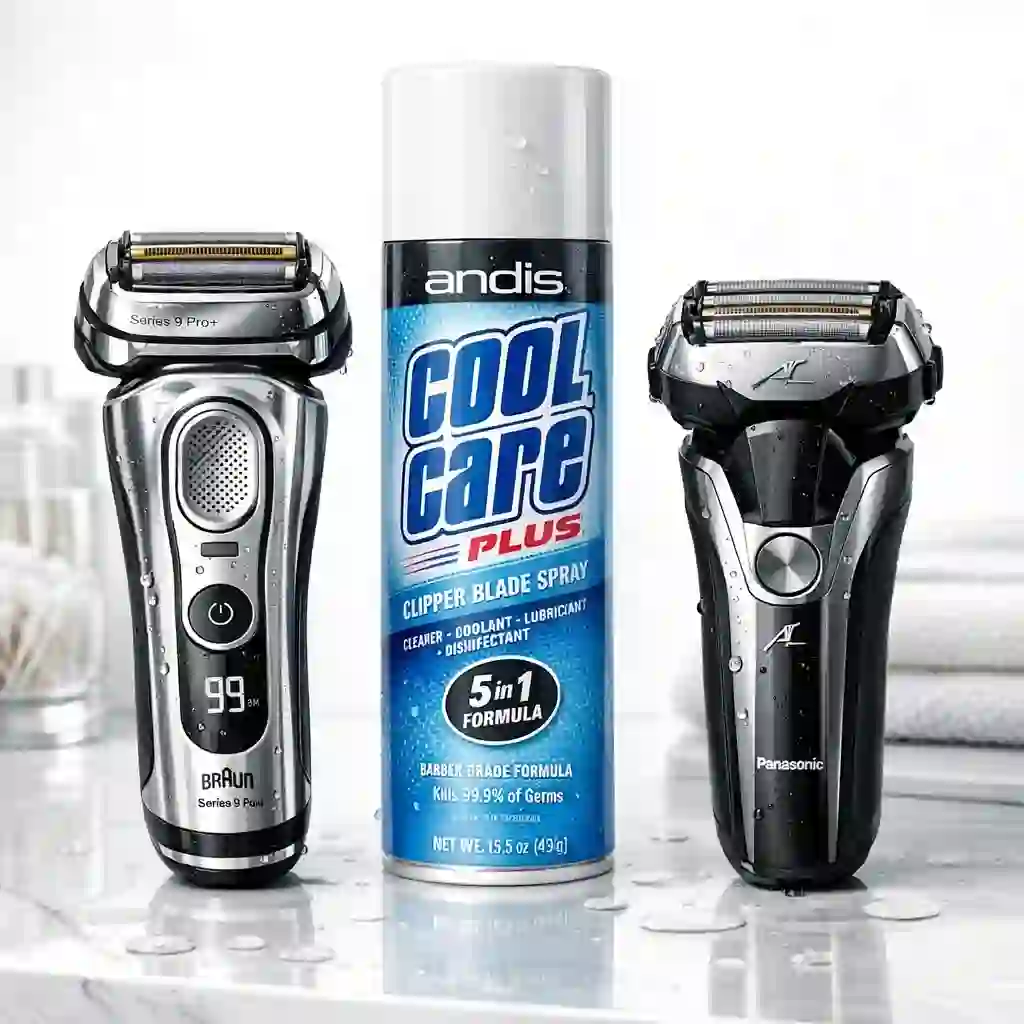
And for a complete, all-in-one solution, a cleaning spray like Andis Cool Care Plus is an indispensable part of learning how to clean electric shaver heads properly. Mastering the art of how to clean electric shaver components is the first step toward a flawless grooming routine. This guide provides the essential knowledge for anyone asking how to clean electric shaver parts effectively.
1. Why Learning How to Clean Electric Shaver is Your Most Valuable Grooming Skill
Understanding how to clean electric shaver units is more than just a chore; it's a critical skill that impacts your shave quality, skin health, and wallet. Neglecting this simple task leads to a host of problems that are easily avoidable. From a performance standpoint, a clogged shaver simply cannot function as designed.
For your skin, it becomes a hygiene issue. And economically, poor maintenance shortens the lifespan of expensive components. Learning the correct procedure for how to clean electric shaver heads is an investment in your daily comfort and long-term savings.
The process of how to clean electric shaver parts is straightforward once you know the steps. Many users wonder how to clean electric shaver blades without causing damage, a valid concern we will address.
This video provides a great visual tutorial on the basic maintenance steps, reinforcing the importance of regular upkeep for anyone learning how to clean electric shaver models.
Visual Guide on Shaver Maintenance
youtube.com
1.1 The Performance Killer: How Debris Clogs Your Clean Electric Razor Blades
Your shaver's performance degrades significantly when it's clogged with hair, dead skin cells, and skin oils. These materials create a barrier between the cutting elements and your beard. The blades can no longer catch and cut hairs efficiently, leading to pulling, missed spots, and the need for multiple passes over the same area.
This not only wastes time but also increases friction and irritation. A proper guide on how to clean electric shaver blades is essential. Research shows that a clogged head can reduce shaving efficiency by up to 40%.
Keeping your clean electric razor blades free of debris is the secret to a consistently close and comfortable shave. The first step in how to clean electric shaver systems is always removing this physical buildup.
1.2 The Skin Nightmare: How a Dirty Shaver Causes Razor Bumps and Folliculitis
A dirty shaver is a breeding ground for bacteria. The warm, moist environment inside the shaving head is the perfect place for germs to multiply. When you shave, these bacteria are transferred directly onto your skin, leading to common issues like acne, razor bumps (pseudofolliculitis barbae), and even painful infections like folliculitis.
This is a major reason why knowing how to clean electric shaver heads is crucial for skin health. Dermatologists confirm that unsanitary shaving tools are a primary cause of post-shave irritation. Sanitizing your shaver is a non-negotiable step in any effective grooming routine, and a key part of learning how to clean electric shaver components thoroughly.
This Reddit thread discusses the real-world consequences of not cleaning a shaver, with users sharing their experiences with skin infections, reinforcing the guide's points on hygiene.
1.3 Extending Lifespan: How to Maintain Electric Grooming Tools and Save Money
Properly maintaining your grooming tools directly translates to financial savings. Electric shaver heads are precision-engineered and expensive to replace. For example, a replacement cassette for a Braun Series 9 can cost over $30.
Regular cleaning and lubrication reduce wear and tear on the foils and cutters, extending their life from a mere 12 months to 18 months or even longer. This simple habit can save you a significant amount of money over the life of your shaver. Learning how to maintain electric grooming tools is an economical choice.
The process of how to clean electric shaver parts also includes lubrication, which is vital for longevity. This guide on how to clean electric shaver devices emphasizes cost-saving practices.
2. Prep for the Clean: What Tools Do You Need for How to Clean Electric Shaver Heads?
Before you begin, gathering the right tools will make the process of learning how to clean electric shaver heads much smoother and more effective. You don't need a professional workshop; most of the essential items are likely already in your home. Having everything ready ensures you can perform a thorough cleaning without interruption.
This preparation is a key step in mastering how to clean electric shaver systems. We'll break down the tools into a basic kit and an advanced setup. This approach to how to clean electric shaver maintenance allows for flexibility based on your needs.
A good understanding of how to clean electric shaver tools is fundamental.
This Quora discussion offers various user-recommended tools and DIY solutions for cleaning, providing a practical supplement to the tools listed in this section on how to clean electric shaver heads.
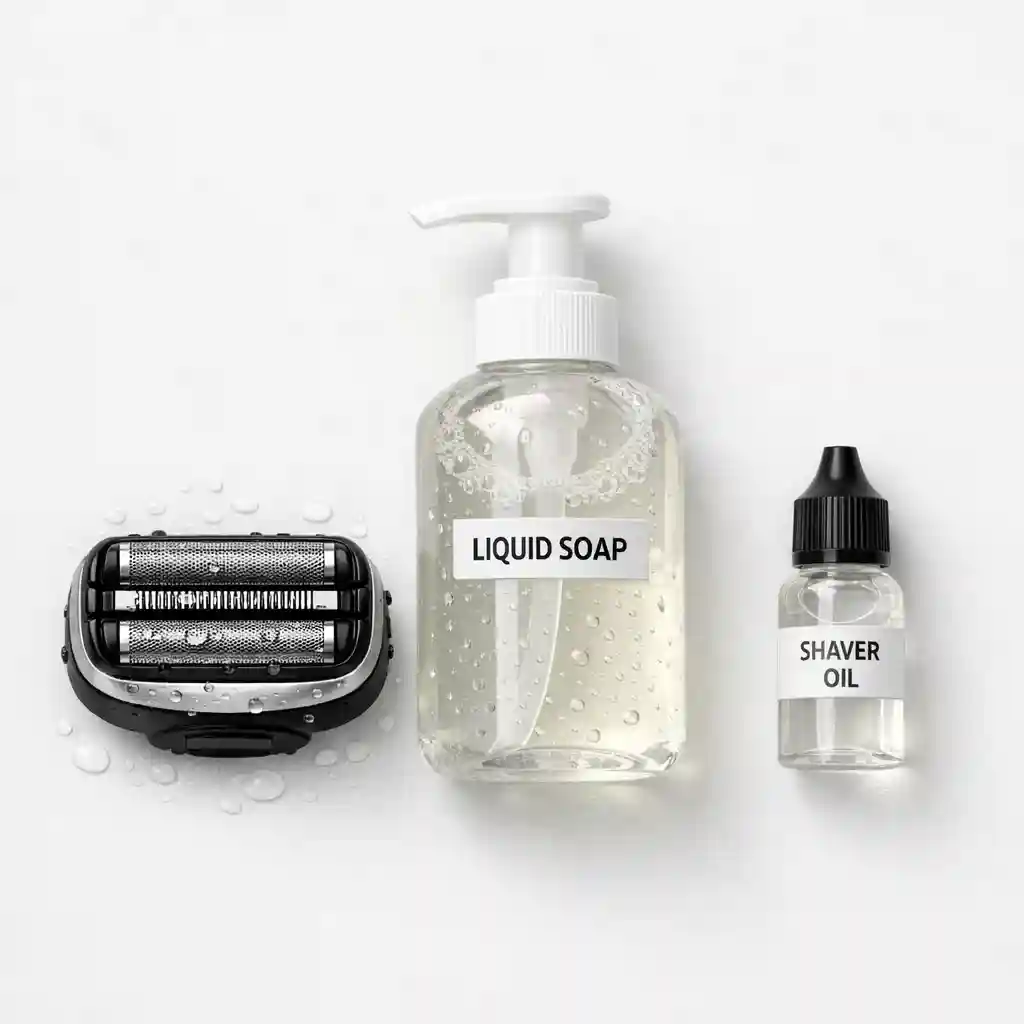
2.1 The Basic Toolkit: Cleaning Brush, Warm Water, and Liquid Soap
For routine cleaning, you only need three simple items. A small cleaning brush, which usually comes with your shaver, is perfect for removing dry debris. If you've lost it, a small, firm-bristled paintbrush or even an old toothbrush will work.
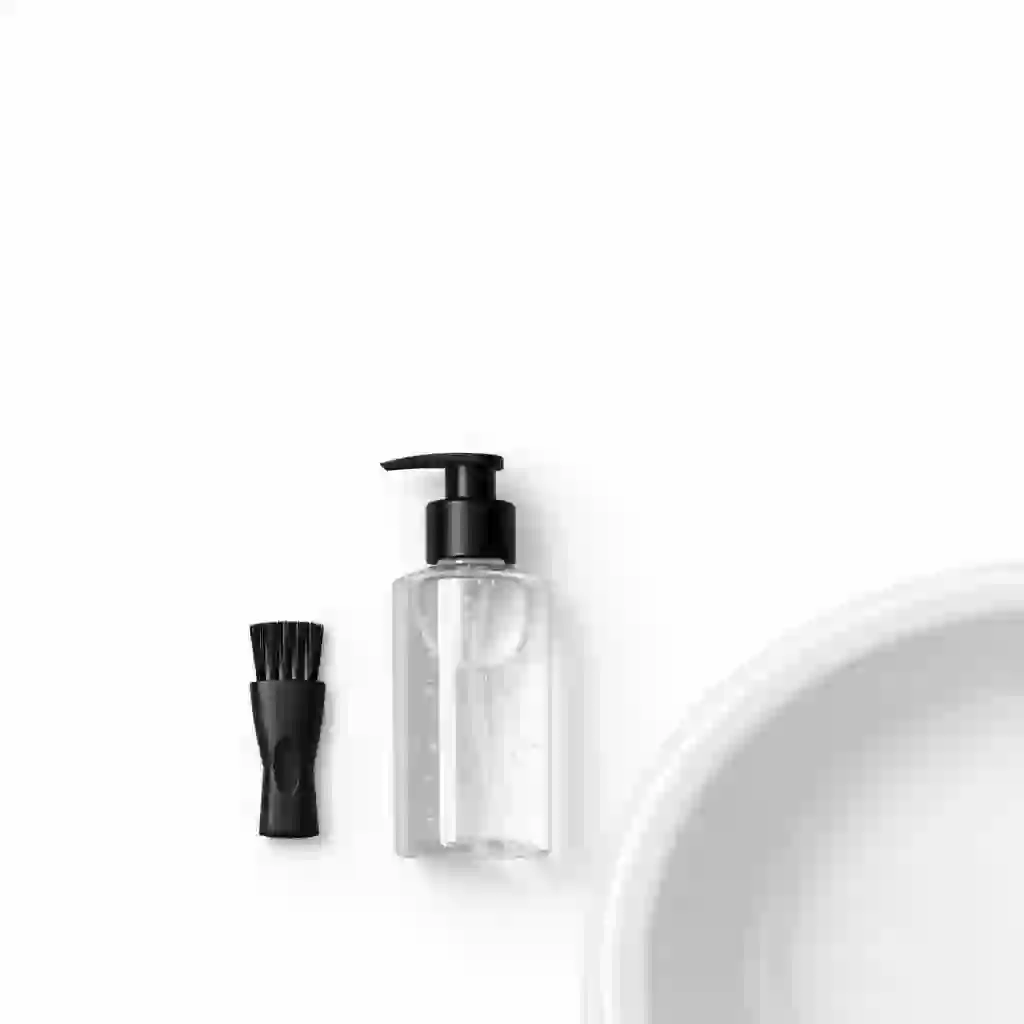
Warm running water is essential for rinsing away hair and soap residue. Finally, a few drops of standard liquid hand soap are all you need to break down skin oils and grime. This basic setup is sufficient for daily or weekly maintenance and is the foundation of understanding how to clean electric shaver devices.
2.2 The Advanced Options: Safe Electronic Cleaning Spray and Lubricant
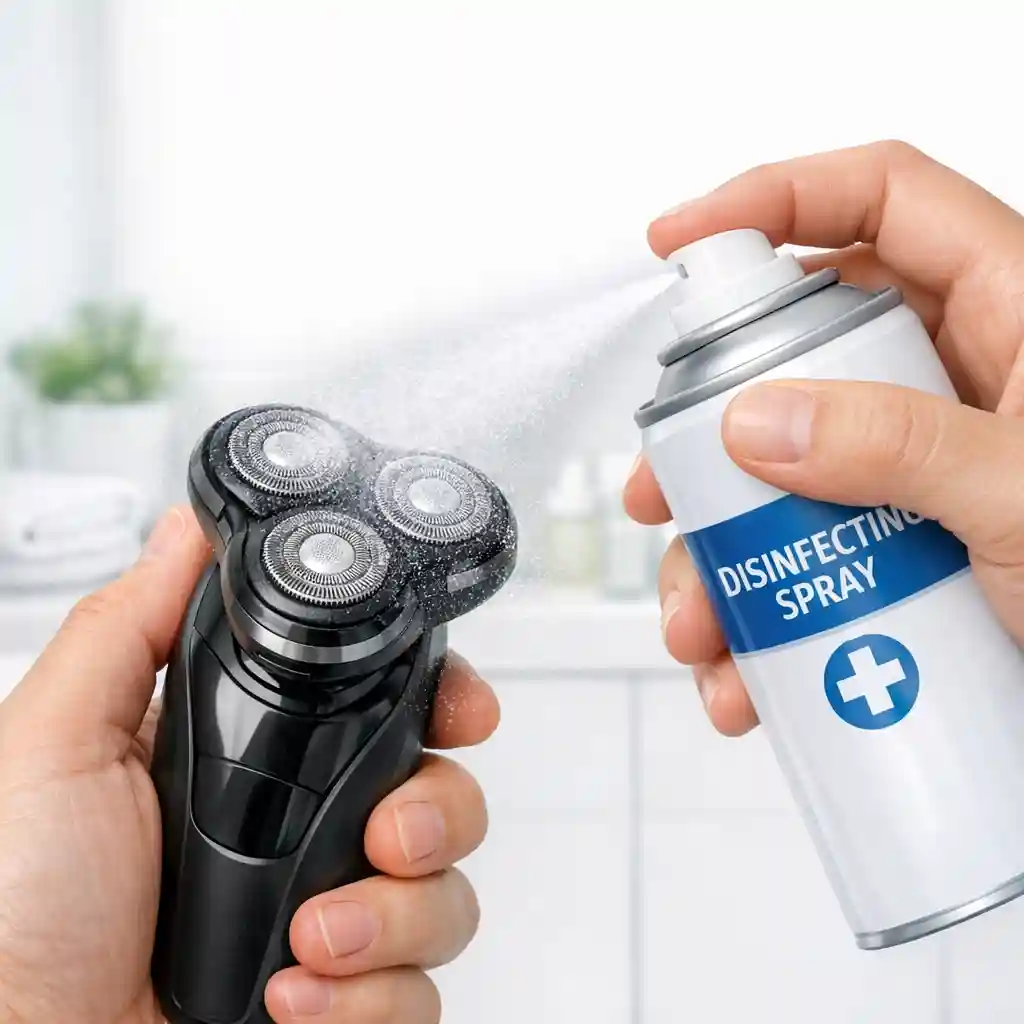
For a deeper clean and better maintenance, consider adding two more items to your arsenal. A safe electronic cleaning spray, like the popular Andis Cool Care Plus, can disinfect, lubricate, and cool the blades all in one step. This is especially useful for shavers that aren't fully waterproof.
Shaver-specific lubricating oil is also a fantastic investment. It reduces friction, heat, and wear on the cutting parts, ensuring they stay sharp and perform optimally for longer. Using these products is a pro-level tip for anyone serious about how to clean electric shaver heads.
This is a crucial part of the how to clean electric shaver process for longevity.
2.3 The Natural Alternatives: The Power of White Vinegar and Baking Soda
If you prefer a more natural or budget-friendly approach, your kitchen pantry holds the key. A solution of equal parts white vinegar and water can effectively dissolve mineral deposits from hard water and act as a mild disinfectant. Simply soak the shaver head components for about 20-30 minutes.

Baking soda can be made into a paste with a little water to gently scrub away stubborn grime. These natural methods are a great addition to your knowledge of how to clean electric shaver parts without harsh chemicals.
3. The Core Method: How to Clean a Foil Electric Shaver
Foil shavers, like those from Braun and Panasonic, are popular for their ability to provide a very close shave. Their design, which features a thin, perforated metal foil over oscillating blades, requires a specific cleaning method. Mastering how to clean electric shaver models of this type is essential for maintaining that closeness and protecting the delicate foil.
This section provides a step-by-step guide. Following these instructions is the best way to learn how to clean electric shaver foil systems. The process ensures both hygiene and performance.
Let's detail the correct way for how to clean electric shaver foil heads.
This TikTok video demonstrates the quick-clean method for a foil shaver, offering a fast, visual guide that complements the detailed steps provided here for how to clean electric shaver foils.
Quick Foil Shaver Cleaning Demo
tiktok.com
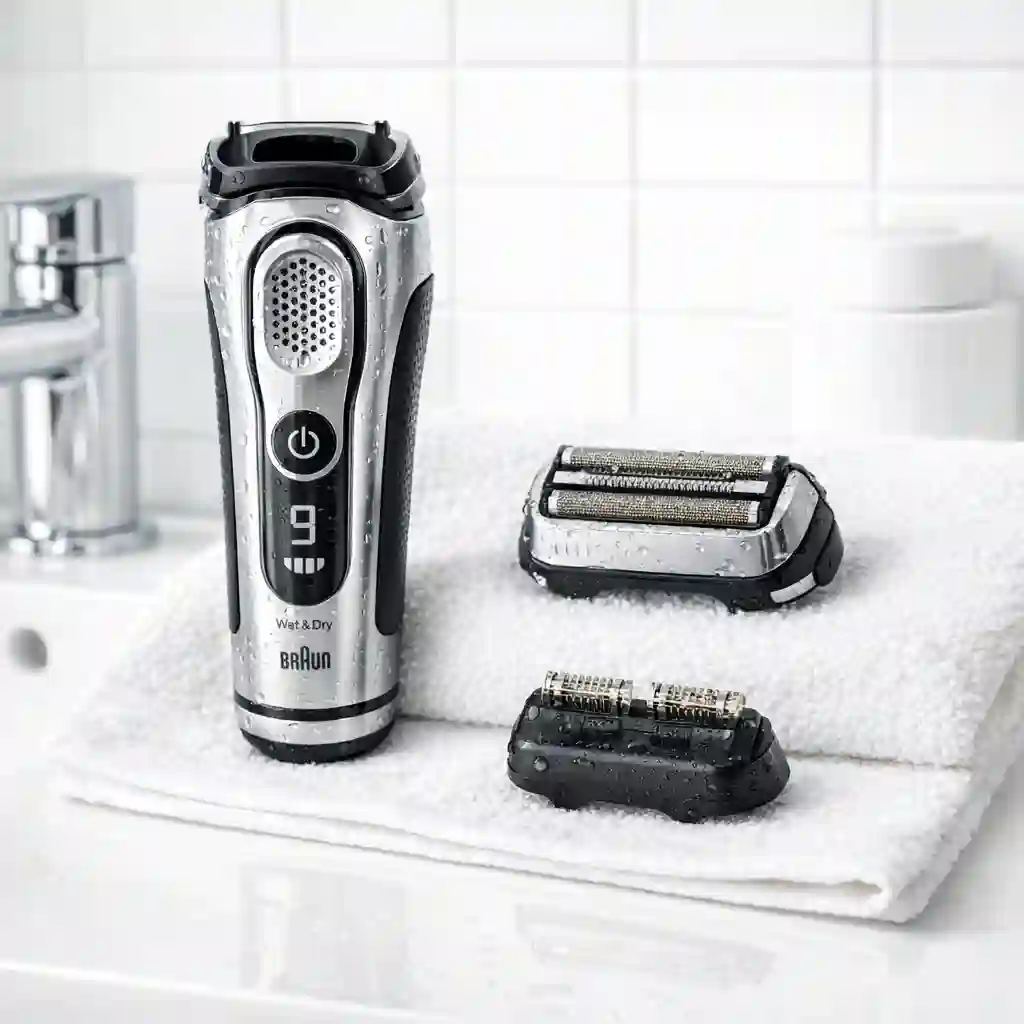
3.1 Step 1: Power Off and Disassemble the Head
Safety first. Always ensure your shaver is turned off and unplugged from the charger before you start cleaning. Remove the foil and cutter cassette from the shaver body.
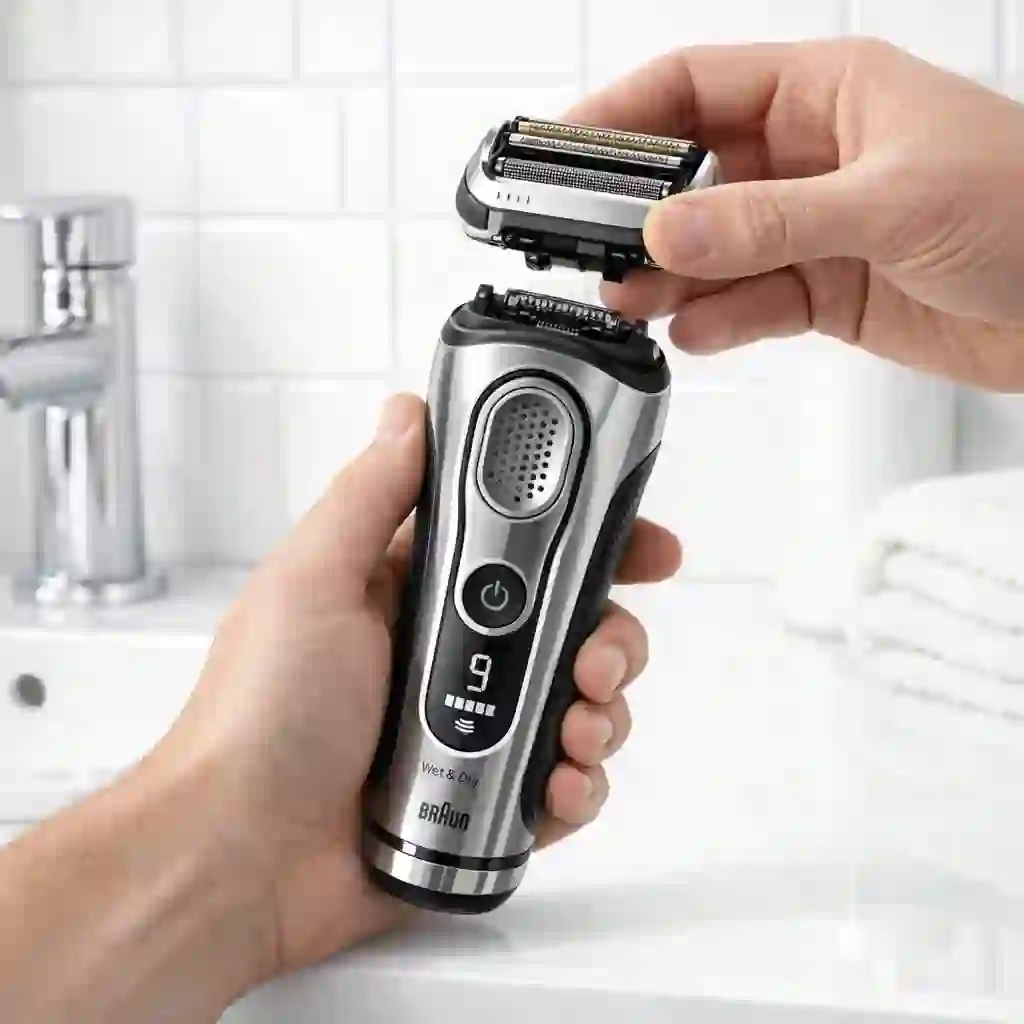
On most models, this is done by pressing one or two release buttons on the sides of the head.
Handle the cassette with care, as the foil is the most fragile part of the shaver. This initial step is fundamental to the process of how to clean electric shaver components safely.
3.2 Step 2: Dry Clean Before You Wash Electric Shaver Foil
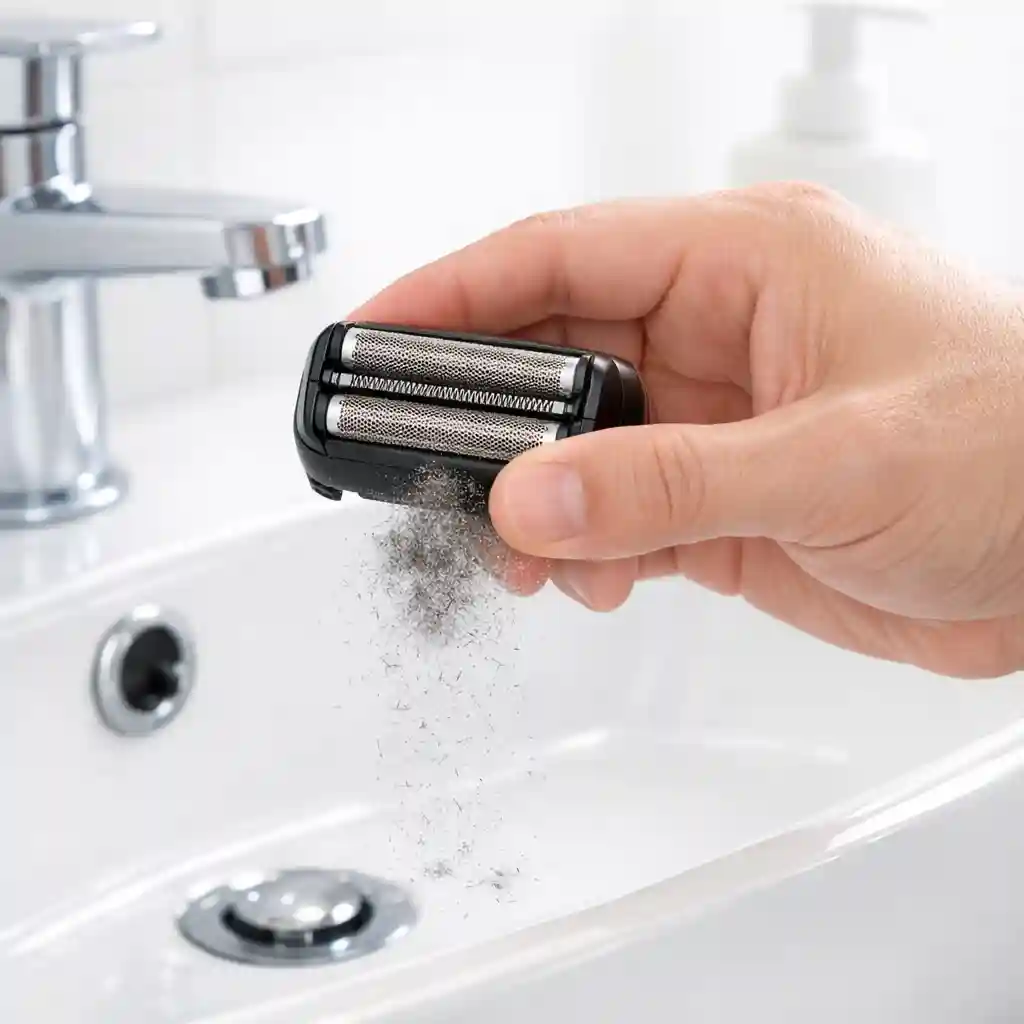
Before introducing water, get rid of the bulk of the debris. Gently tap the open side of the cutter cassette on the edge of your sink to dislodge most of the trapped hair clippings.
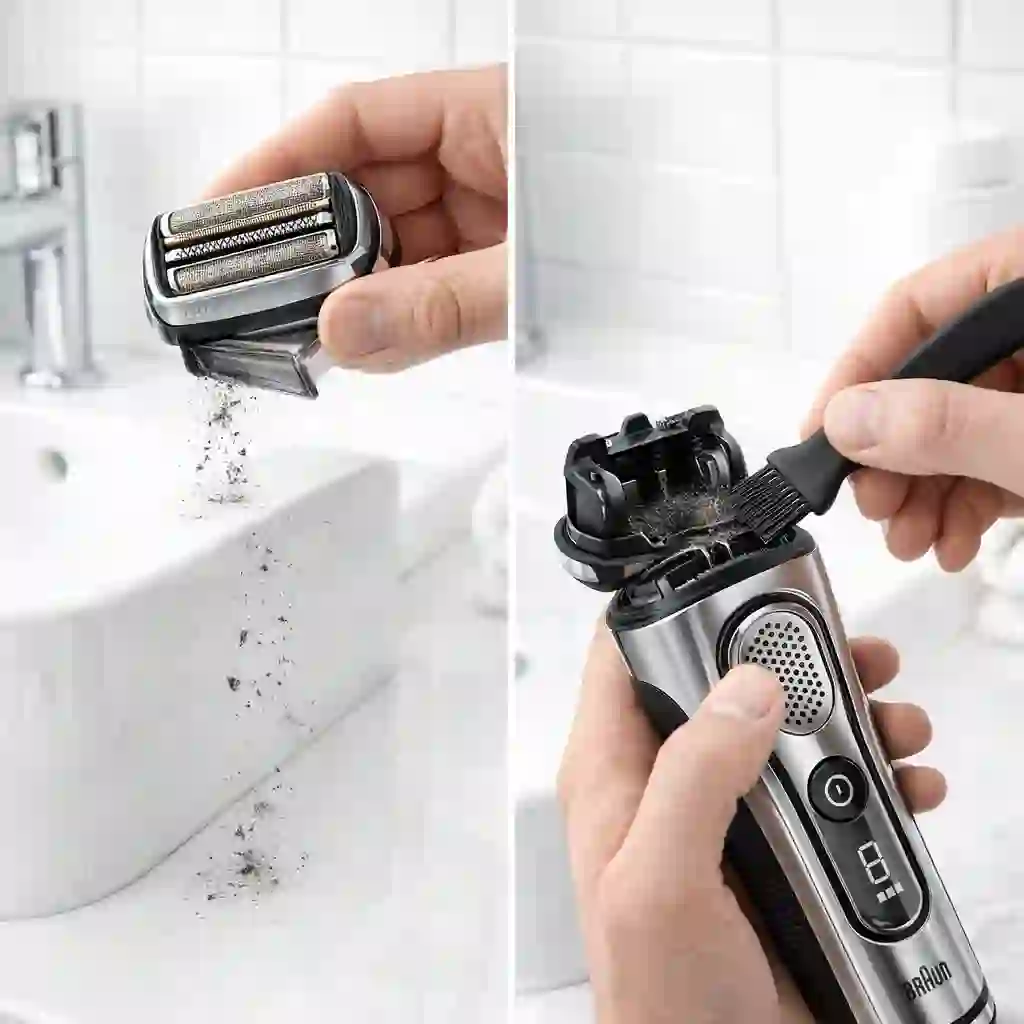
Then, use your cleaning brush to sweep out any remaining dry particles from the cutter block and the shaver's head assembly.
A crucial tip: never use the brush directly on the foil itself. The thin metal can be easily punctured or damaged, rendering it useless. This pre-cleaning step is a vital part of how to clean electric shaver heads effectively.
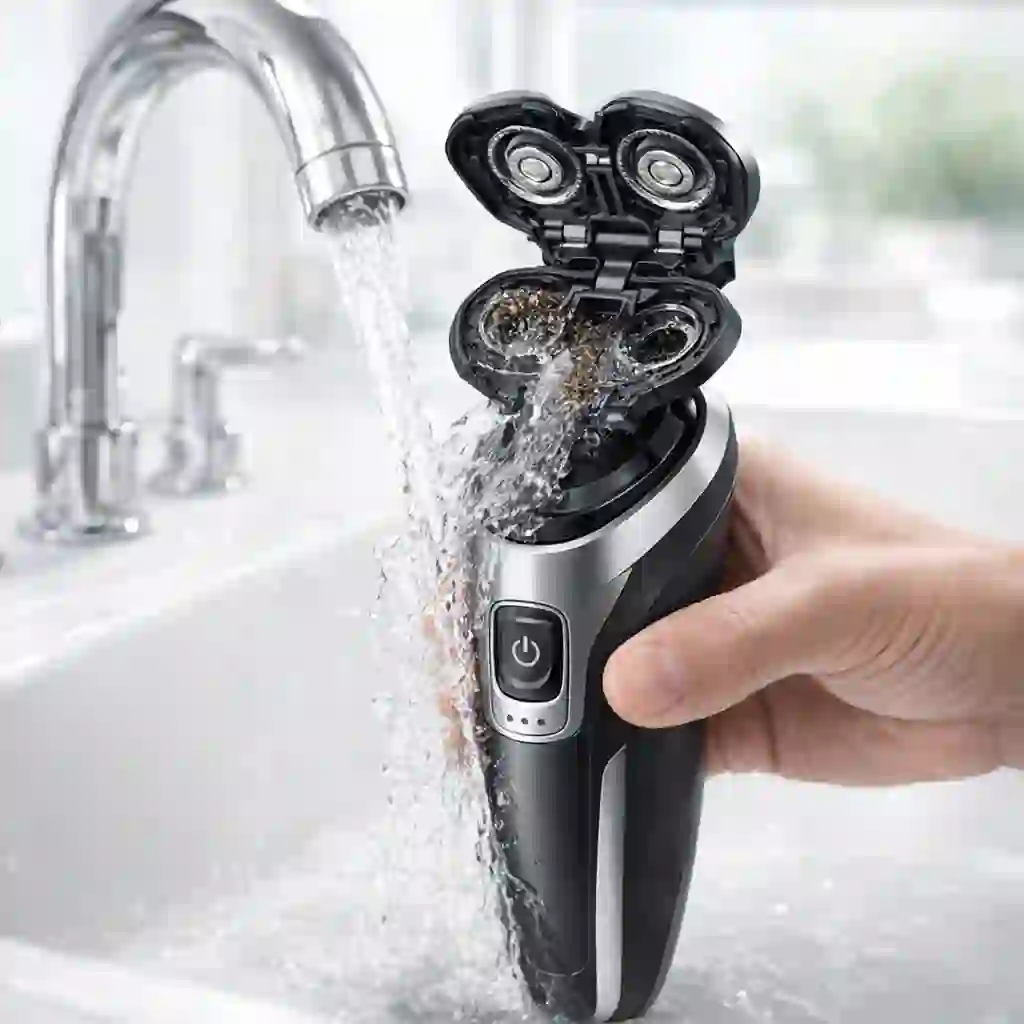
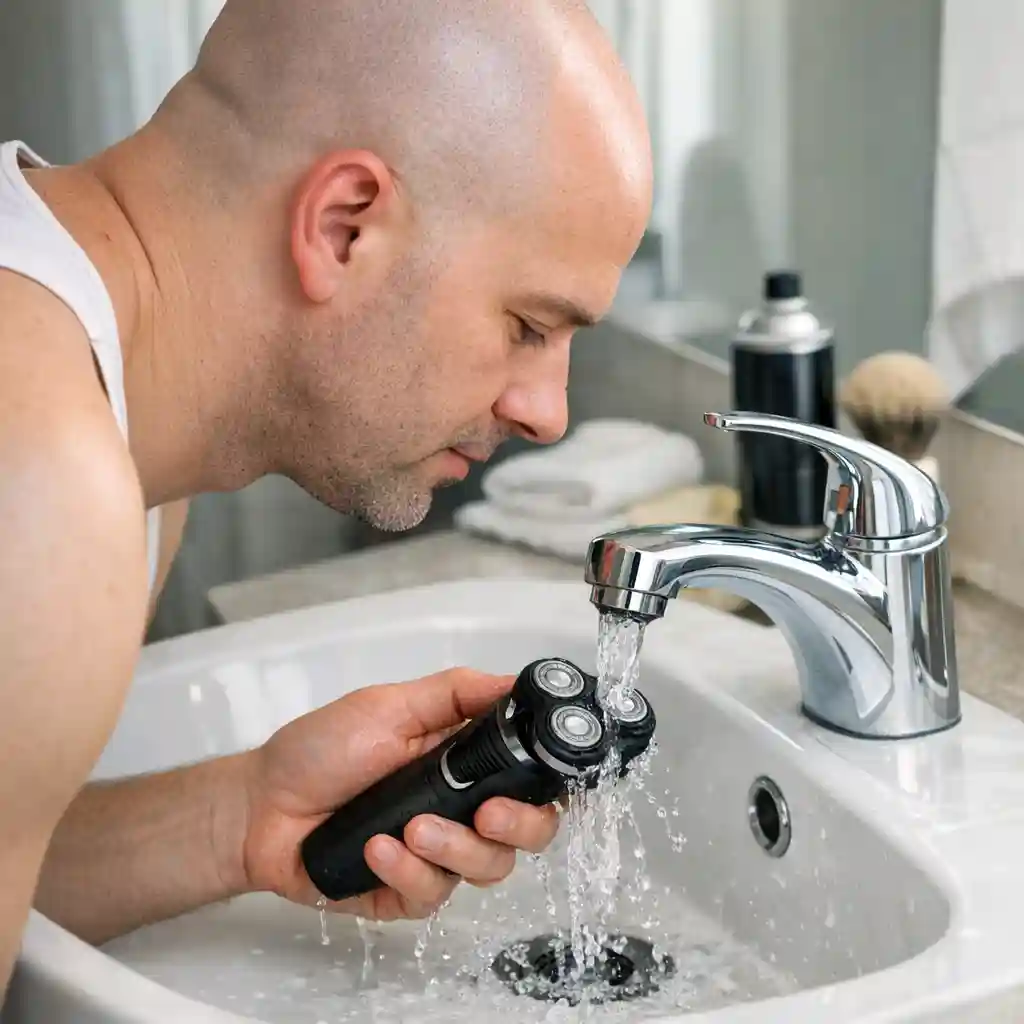
3.3 Step 3: Deep Clean with Soap and Water
Now it's time for a wet clean. Apply a small drop of liquid soap onto the foil. Reattach the head to the shaver body and turn it on for a few seconds. The vibration will work the soap into a lather, breaking down oils inside the cutting elements.
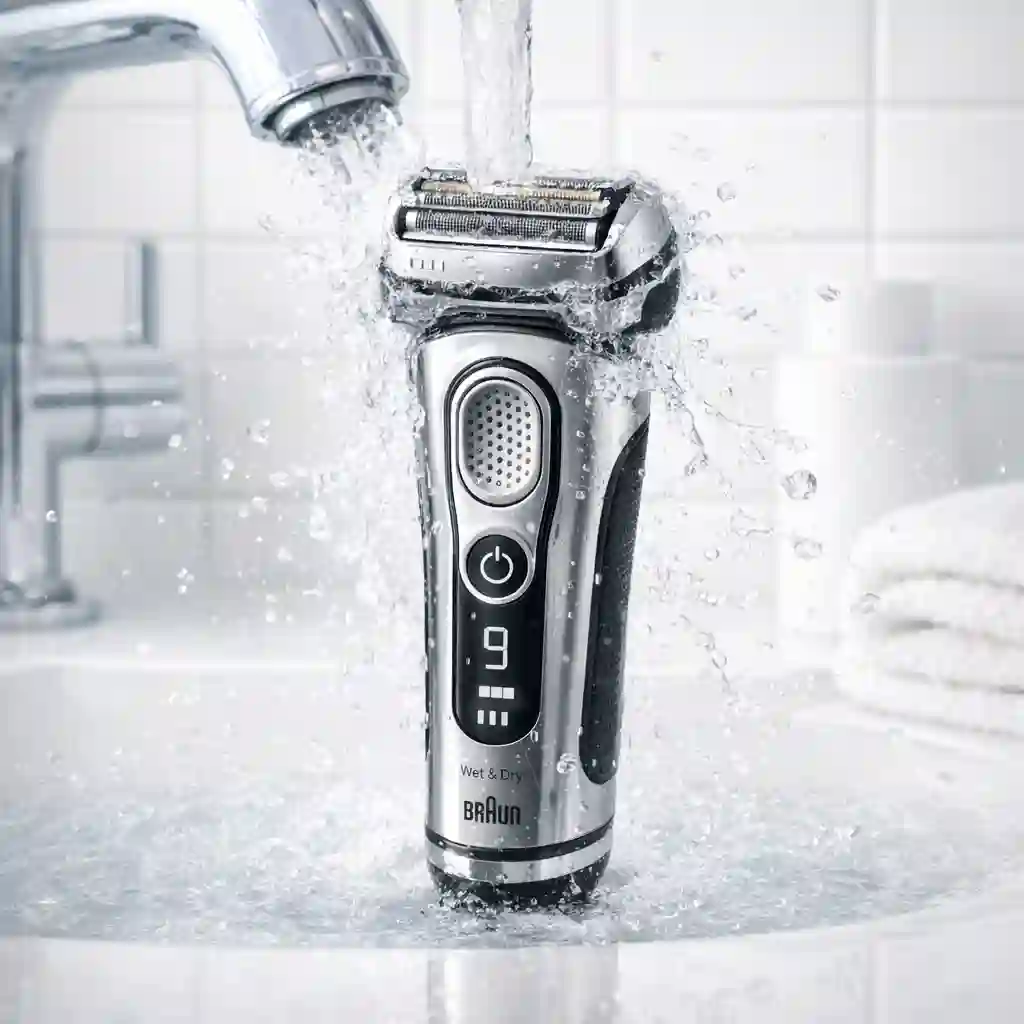
Next, while the shaver is still running, hold the head under warm running water. This will flush out all the soap and loosened debris. This is the most effective method to wash electric shaver foil and is a core technique for how to clean electric shaver devices.
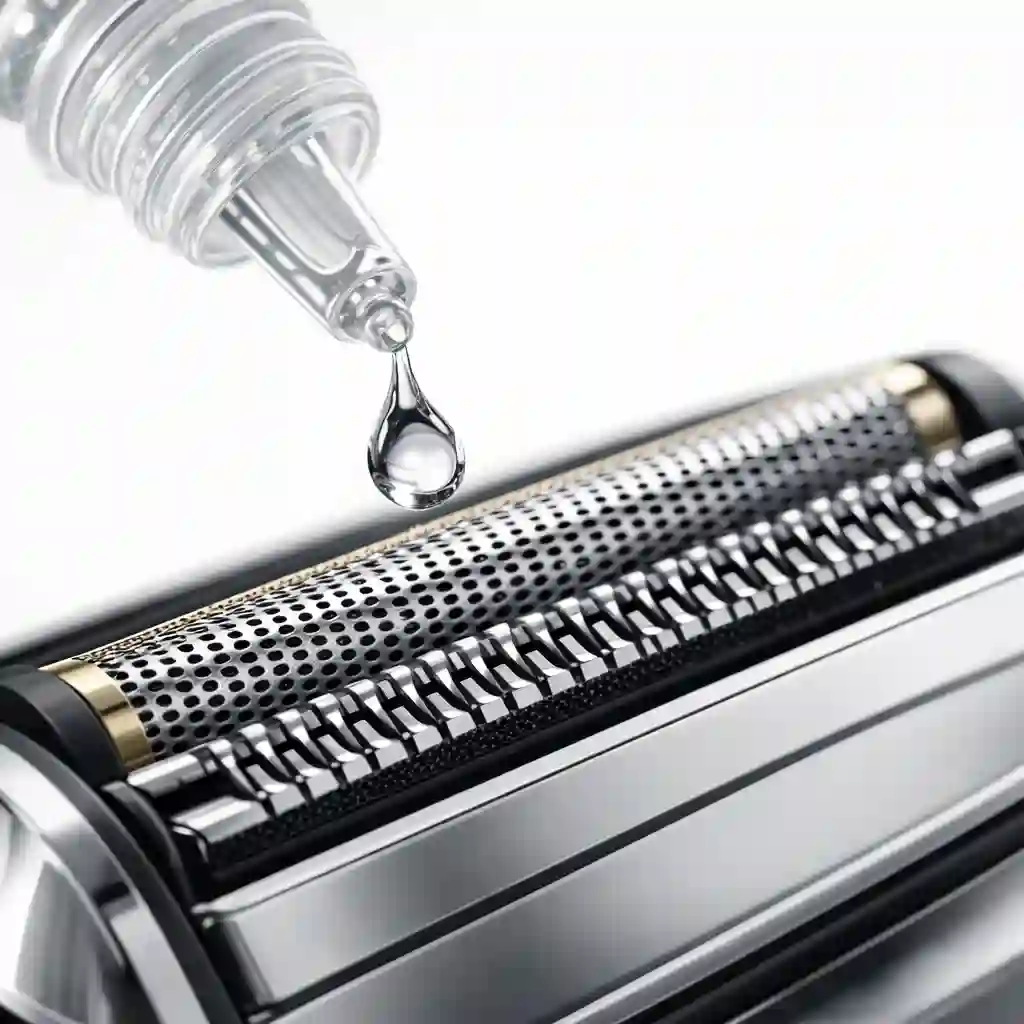
3.4 Step 4: Thoroughly Dry and Lubricate
After rinsing, turn the shaver off and disassemble it again. Shake off any excess water and let all the parts air dry completely on a towel. A damp environment can lead to rust and bacterial growth, so do not skip this step.
Once dry, apply one or two drops of shaver lubricant across the cutters. This final touch in the how to clean electric shaver process ensures the blades run smoothly and efficiently, prolonging their life and giving you a better shave.
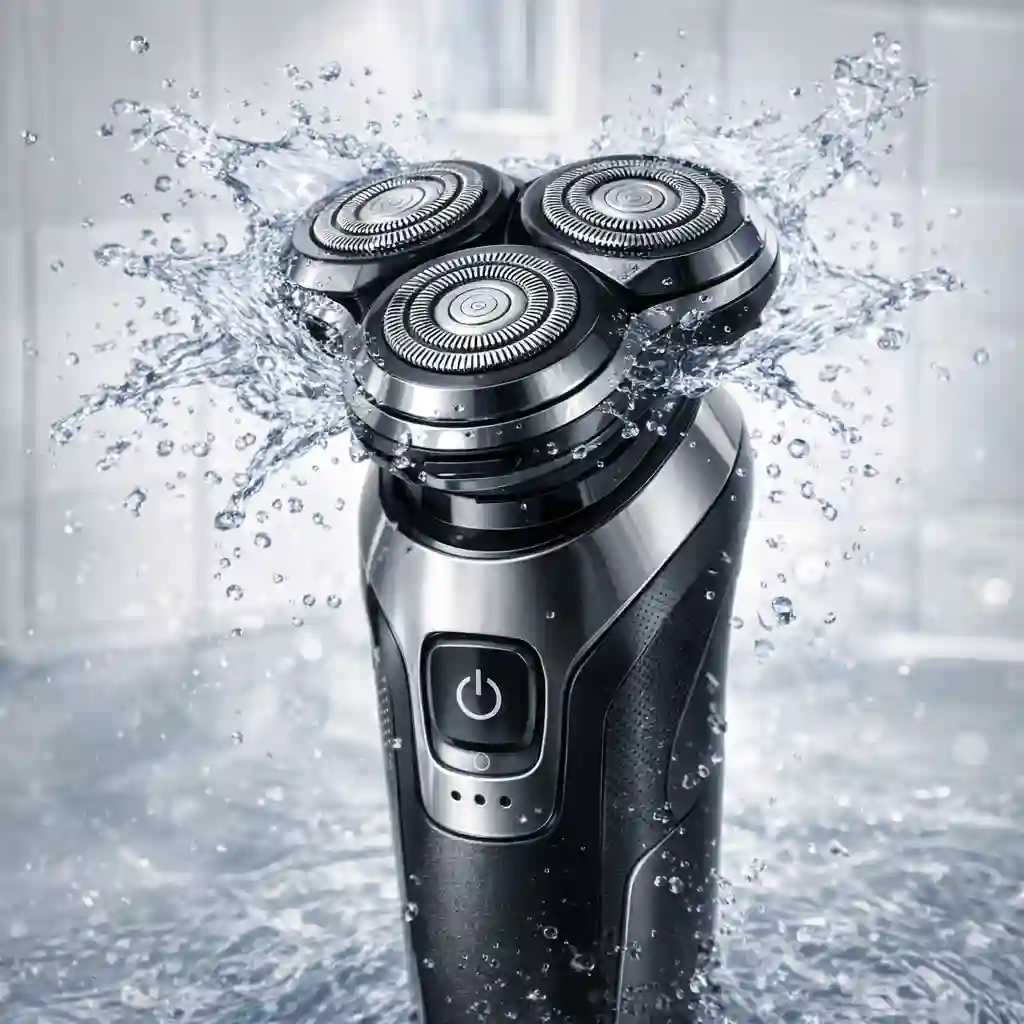
4. How to Clean a Rotary Electric Shaver: What’s Different?
Rotary shavers, pioneered by Philips Norelco, use spinning circular blades beneath a protective guard. Their cleaning process is slightly different from foil shavers, particularly when it comes to deep cleaning.
While daily rinsing is similar, the monthly maintenance requires more disassembly.
Understanding these differences is key to learning how to clean electric shaver models of this type. This section will guide you through the specific steps for rotary shavers. Proper care is essential, and knowing how to clean electric shaver rotary heads will extend their life.
Let's explore the nuances of how to clean electric shaver rotary systems.
This Reddit thread provides a detailed discussion on the pros and cons of daily rinsing versus less frequent deep cleaning, offering valuable user perspectives on how to clean electric shaver rotary models.
4.1 Daily Cleaning: The Quick Rinse
For daily upkeep, the process is simple. After your shave, turn the shaver off and rinse the shaving unit under warm running water. Most modern rotary shavers have a head that flips open with the press of a button, allowing you to easily rinse out the hair chamber.
Let it air dry before closing the head. This quick rinse is a fundamental habit for anyone wanting to know how to clean electric shaver heads on a daily basis.
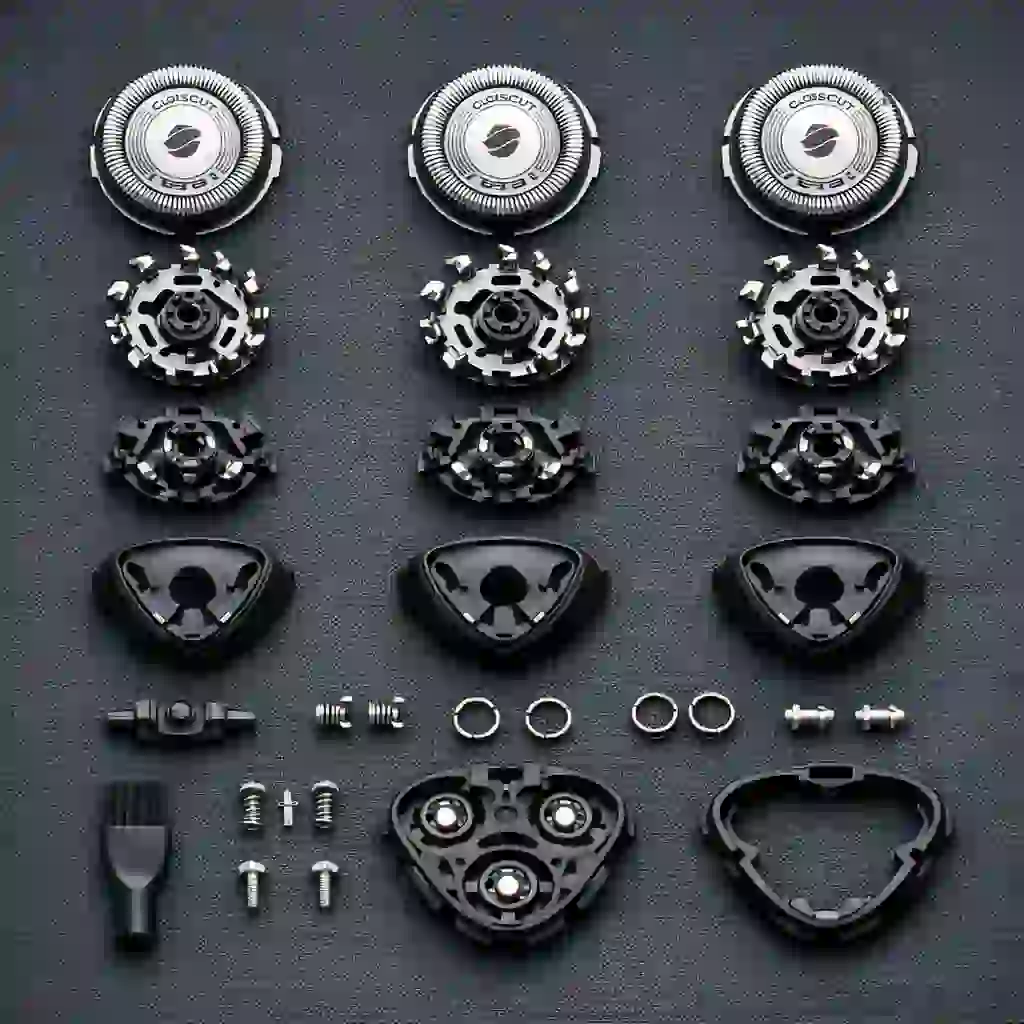
4.2 Monthly Deep Clean: Don't Mix Up the Cutter Pairs
About once a month, you need to perform a deep clean. This involves completely disassembling the shaving head. You'll remove the retaining frame and take out each individual cutter and comb.
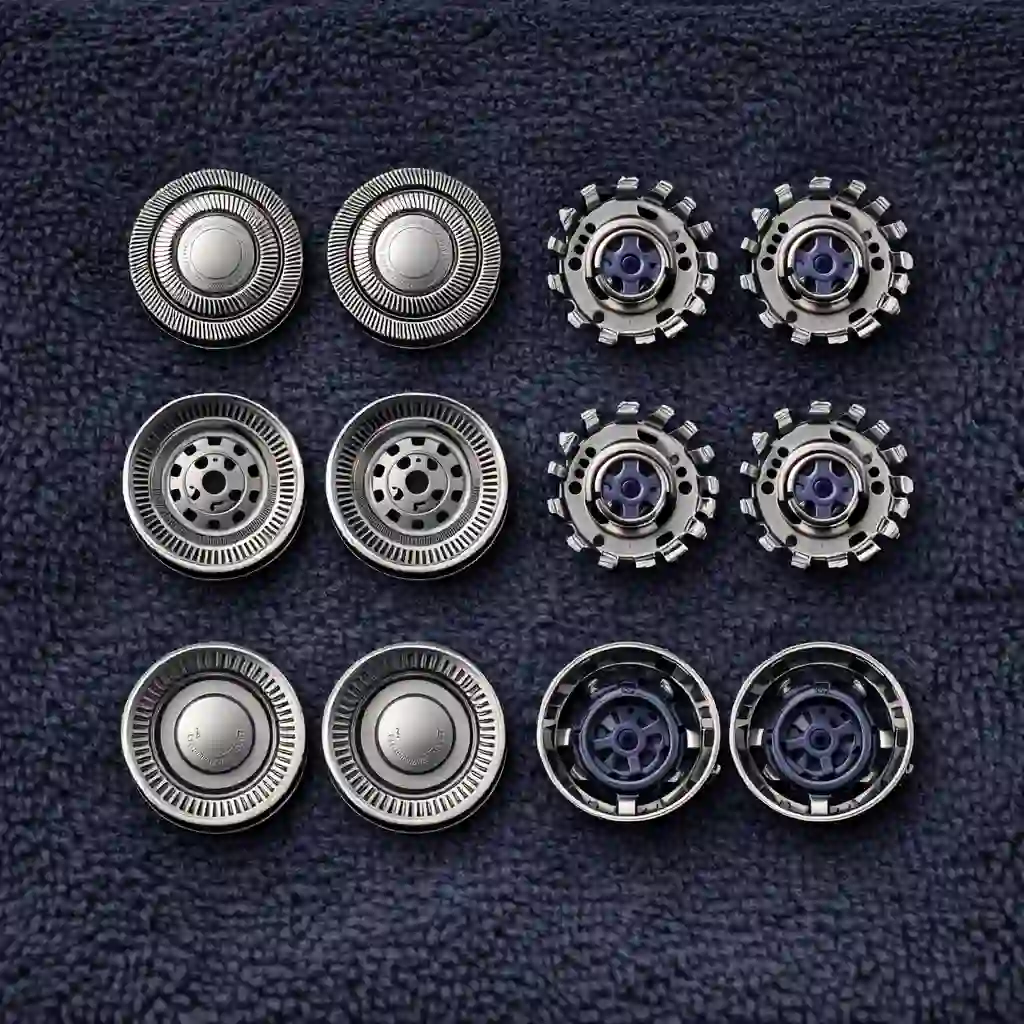
The most critical rule here is to keep each cutter and comb as a matching pair. They have been sharpened and worn together as a set. Mixing them up will drastically reduce shaving performance and comfort.
A user on a shaving forum shared that mixing them up cost him a $30 replacement head because the shave became so poor. This is the most important pro tip for how to clean electric shaver rotary models.
4.3 The Disinfection Step: Sanitize Like You Sanitize Electric Toothbrush Heads
While the parts are disassembled, it's the perfect time to disinfect them. You can use a method similar to how you would sanitize electric toothbrush heads. A brief soak in 70% isopropyl alcohol or a wipe-down with an alcohol-soaked cotton pad will kill any lingering bacteria.

This ensures your shave is not only close but also hygienic. This sanitization step is a crucial part of a thorough how to clean electric shaver routine, preventing skin issues before they start.
5. Top 5 Electric Shavers of 2026: A Comparative Guide
Choosing the right electric shaver is just as important as knowing how to clean electric shaver models. The market is filled with options, each with unique strengths. This section compares five of the top models available in 2026, helping you decide which is the best foil shaver for sensitive skin, the best head and face shaver, or the best overall performer for your needs.
A great shaver is a long-term investment, and this comparison will guide your purchase decision. Understanding how to clean electric shaver units is easier when you have a quality device.
Here is a detailed comparison of the top contenders:
| Feature | Braun Series 9 Pro+ | Panasonic ARC5 | Philips Norelco 9000 Prestige | Andis ProFoil Lithium | Freebird (FlexSeries) |
|---|---|---|---|---|---|
| Shaver Type | Foil | Foil | Rotary | Foil | Rotary |
| Best For | Overall Performance & Comfort | Closest Shave | Sensitive Skin (Rotary) | Fades & Stubble | Head Shaving |
| Wet & Dry Use | ✅ | ✅ | ✅ | ❌ | ✅ |
| Motor Power | Excellent | Highest | Very Good | Good | Good |
| Battery Life | 60 min | 50 min | 60 min | 80 min | 90 min |
| Cleaning Ease | Very Easy (or Station) | Easy | Easy | Moderate | Very Easy |
| Price Range | $$ | $$ | $$ | $ | $ |
5.1 Purchase Decision Guide
- For the Ultimate Shave: If you want the best possible combination of closeness and comfort and are willing to invest in a premium device, the Braun Series 9 Pro+ is the undisputed champion. Its cleaning station also simplifies the how to clean electric shaver process.
- For the Closest Possible Cut: If your priority is getting a shave as close as a blade, the Panasonic ARC5 is your best bet. Its ultra-fast motor and sharp blades excel at cutting tough beards, though it can be slightly more aggressive on sensitive skin.
- For Rotary Fans with Sensitive Skin: If you prefer the contour-following abilities of a rotary shaver but have sensitive skin, the Philips Norelco 9000 Prestige is the top choice. Its SkinIQ technology helps reduce irritation.
- For Barbers and Detail Work: The Andis ProFoil Lithium is a barber-grade tool perfect for finishing fades and maintaining a clean stubble look. It's a no-frills workhorse, and learning how to clean electric shaver heads on this model is straightforward.
- For the Perfect Bald Head: The Freebird (FlexSeries) is specifically designed as a best head and face shaver. Its ergonomic design and multiple rotary heads make shaving your own head fast and easy, making it the top electric shaver for head and face use.
6. Sensitive Skin Guide: How to Clean Your Shaver to End Irritation
For those with sensitive skin, the question of how to clean electric shaver units takes on a new level of importance. An improperly cleaned shaver is a primary trigger for redness, bumps, and that burning sensation post-shave. This section is dedicated to the electric shaver sensitive skin user.
We'll cover gentle cleaning methods, product choices, and post-shave care to ensure your grooming routine is a soothing experience, not a painful one. Mastering how to clean electric shaver heads for sensitive skin is about minimizing all potential irritants. This is the definitive guide on how to clean electric shaver parts for delicate skin.
This YouTube video offers excellent tips specifically for shaving with sensitive skin, which directly relates to the importance of a clean shaver in preventing irritation.
Shaving Tips for Sensitive Skin
youtube.com
6.1 Choose Gentle Cleansers: The Logic of Shaving Soap for Sensitive Skin
Harsh chemicals and strong fragrances are the enemies of sensitive skin. Avoid cleaning solutions with high concentrations of alcohol or other aggressive detergents. Instead, opt for a very mild, fragrance-free liquid soap.
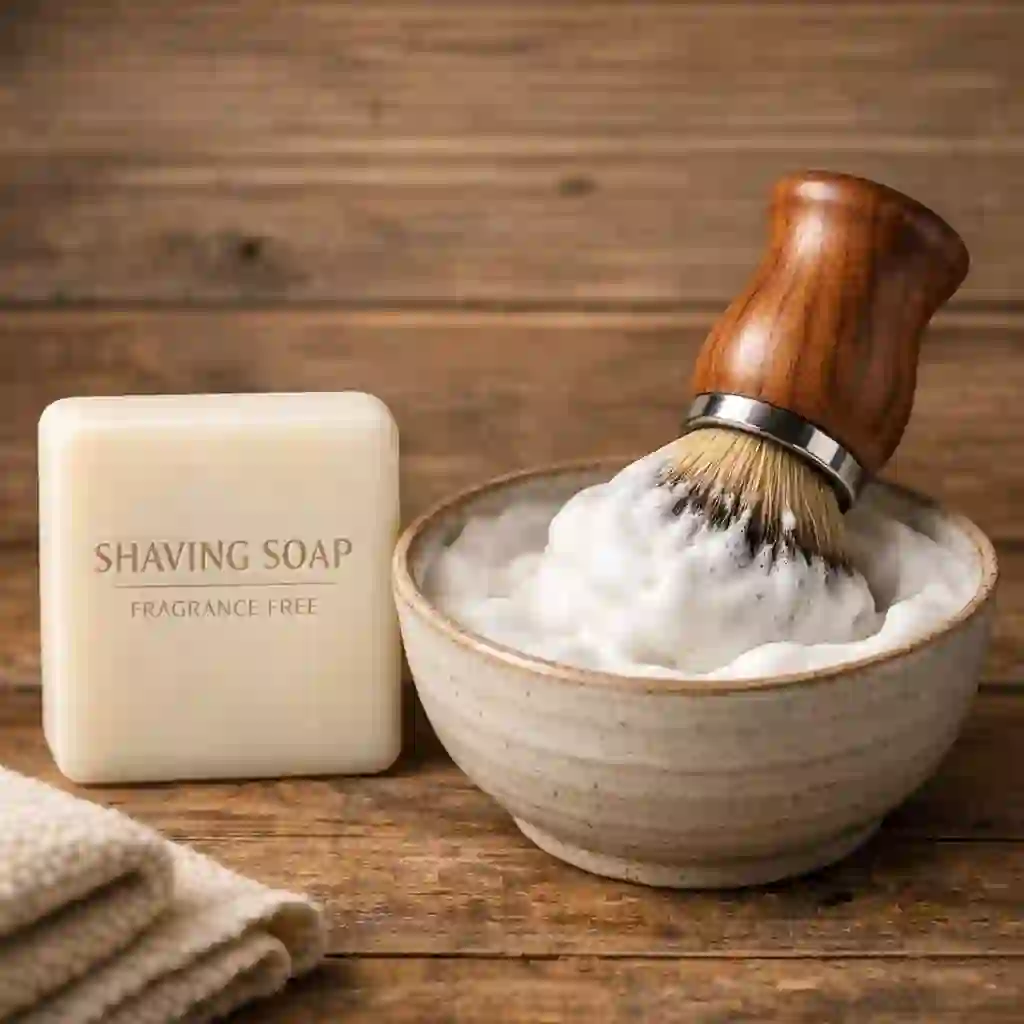
Even better, use a high-quality shaving soap for sensitive skin to create a lather for cleaning. These soaps are formulated to be gentle and can effectively clean your shaver without leaving behind irritating residues. This is a key principle in learning how to clean electric shaver components for sensitive users.
6.2 Why the Best Foil Shaver for Sensitive Skin is Often Easier to Clean
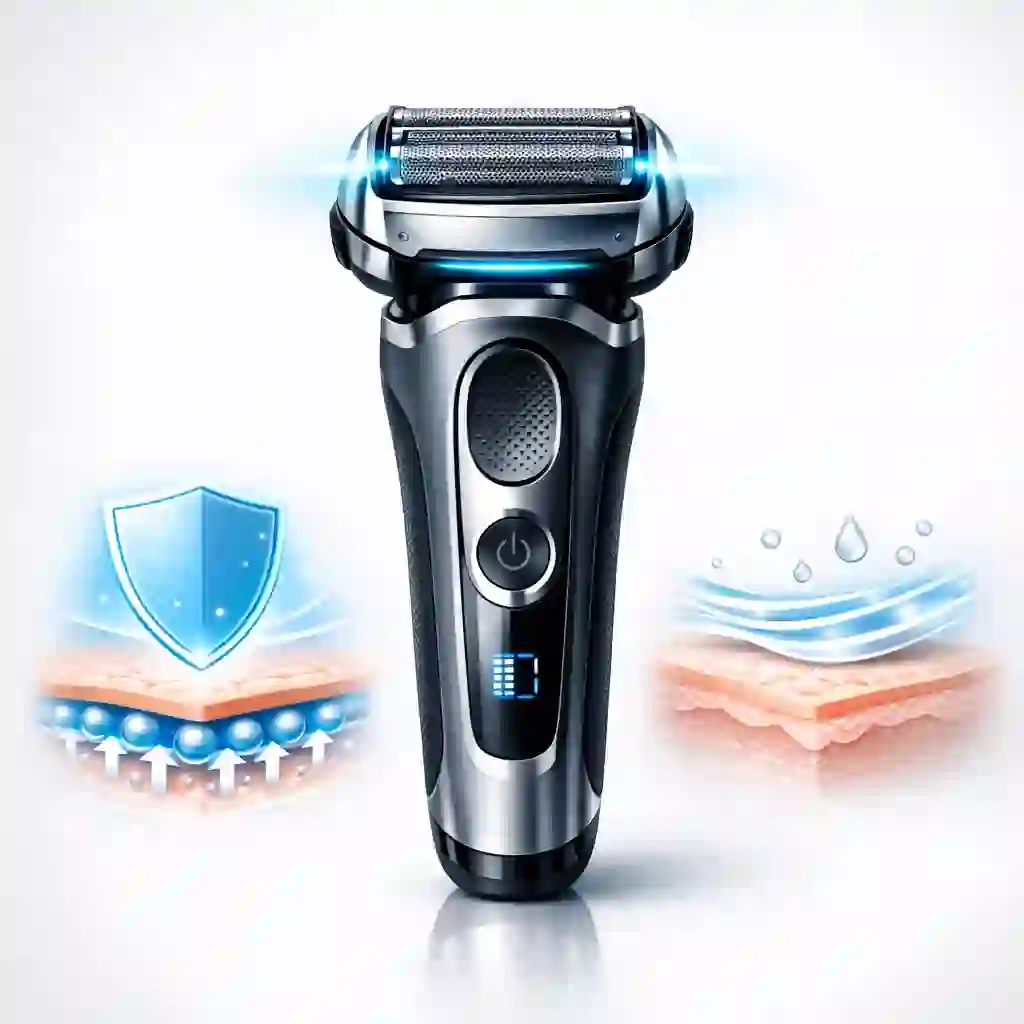
There's a reason why the best foil shaver for sensitive skin, like the Braun Series 8 or 9, is so highly recommended. Dermatological studies have shown that foil shavers can reduce friction by up to 30% compared to rotary models. From a cleaning perspective, their simpler head design (a single cassette) is often easier to rinse thoroughly, ensuring no soap or debris is left behind to cause irritation.
This makes the how to clean electric shaver process more reliable for the electric shaver sensitive skin user. It's the best razor for sensitive skin men can choose.
6.3 Post-Clean Care for Electric Shaver Sensitive Skin Users
Your care routine doesn't end after you've learned how to clean electric shaver heads. What you do after the shave is just as important. Always rinse your face with cool water to close the pores. Gently pat your skin dry with a clean towel.

Then, apply a soothing, alcohol-free aftershave balm or a high-quality shaving cream for sensitive skin that has moisturizing properties. This creates a protective barrier and calms any potential irritation.
6.4 When Electric Isn't Enough: Natural Hair Removal for Sensitive Skin vs. Depilatory Cream
For some individuals with extreme sensitivity, even the best foil shaver for sensitive skin can be too much. In these cases, it's worth exploring other options. Natural hair removal for sensitive skin methods, such as sugaring, can be effective but require more effort.
A depilatory cream for sensitive skin is another alternative. These creams dissolve the hair at the surface, avoiding the friction of a blade entirely. It's important to patch-test these creams first, as they can also cause chemical irritation in some users.
7. Special Guide for Head Shavers: How to Clean the Best Head and Face Shaver
Shaving your head with an electric shaver presents a unique set of challenges, especially when it comes to cleaning. The volume of hair is much greater, and the scalp can be just as sensitive as the face. This section is a dedicated guide for users of the best head and face shaver.
We'll cover the specific cleaning strategies needed to handle more debris and prevent scalp folliculitis. Knowing how to clean electric shaver models used for the head is crucial for hygiene and performance. This is the expert take on how to clean electric shaver units for this specific purpose.
The right electric shaver for head and face requires the right cleaning.
7.1 Why Head Shaving Requires More Frequent Cleaning
Head hair is typically denser and often longer than facial hair, even when kept short. This means your shaver's cutting heads and hair chamber fill up much faster. Furthermore, the scalp produces more oils than the face, creating a stickier debris that can clog the blades more quickly.
For these reasons, if you use your electric shaver for head and face, you must clean it more frequently—ideally after every single head shave—to maintain performance and hygiene. This is the first rule of how to clean electric shaver devices for head shavers.
7.2 Dual-Cleaning Strategy for an Electric Shaver for Head and Face
When you use a single device for both your head and face, cross-contamination is a real risk. Bacteria from your scalp can easily be transferred to your face, and vice-versa. The best practice is to perform a quick clean after shaving your head, before moving on to your face.
This involves at least tapping out all the hair and rinsing the head thoroughly. This simple intermediate step in your how to clean electric shaver routine can prevent a lot of skin problems.
7.3 Using Head Hair Removal Products with Your Shaver
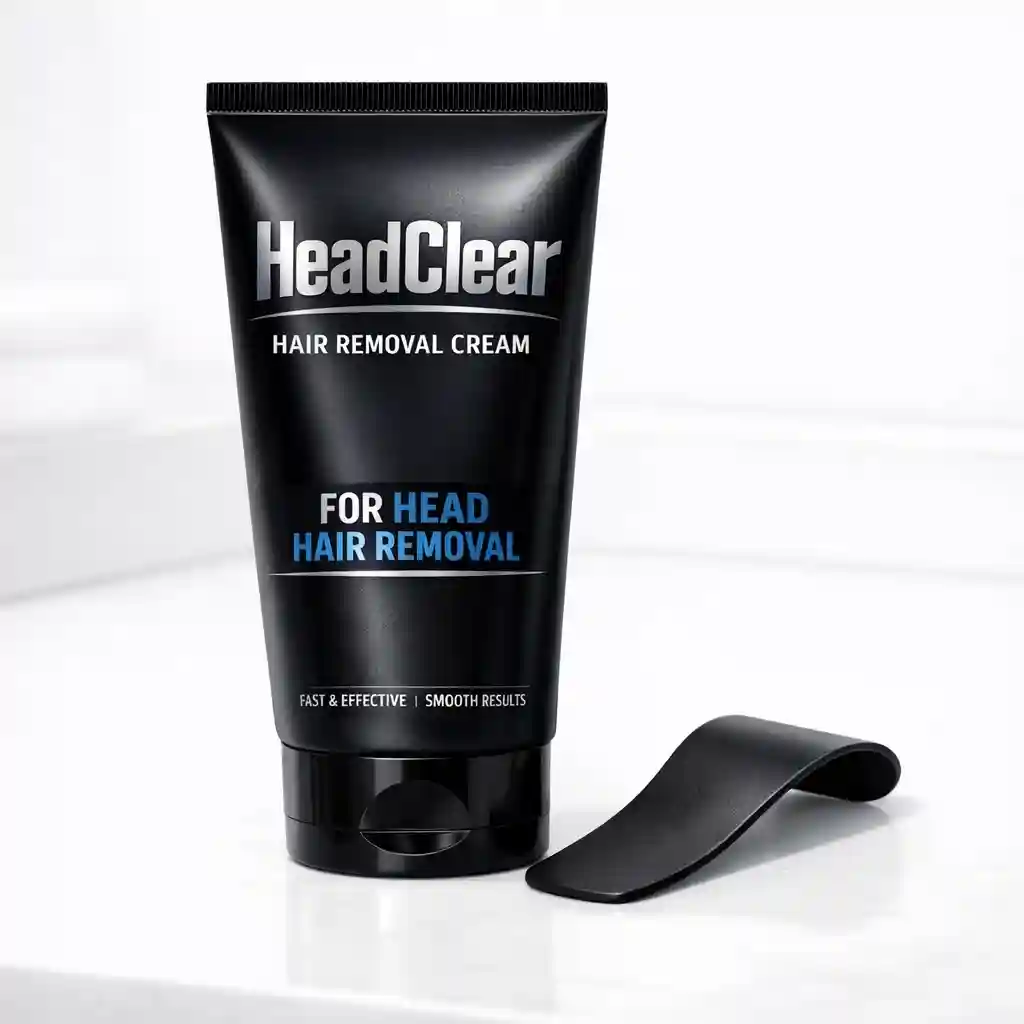
Some people use head hair removal products to manage their bald look. Products like the best hair removal cream for bald head can provide a longer-lasting smoothness. If you use a bald head hair removal cream and then use your shaver for touch-ups a few days later, be aware that chemical residues from the cream can be harsh on the shaver's foils and plastics.
It's extra important to follow a thorough how to clean electric shaver protocol after shaving skin that has been treated with these products.
7.4 Preventing Scalp Folliculitis: Disinfection and Care
Scalp folliculitis—those painful little bumps on your head—is often caused by bacteria from a dirty shaver. After performing the full how to clean electric shaver procedure, a final disinfection step is highly recommended for head shavers. A quick spray with a safe electronic cleaning spray containing a disinfectant is ideal.
This ensures your best head and face shaver is perfectly hygienic for its next use, keeping your scalp clear and healthy.
8. FAQ: Your Top Questions on How to Clean Electric Shaver Answered
Even with a detailed guide, you might still have questions. This FAQ section addresses the most common queries users have about how to clean electric shaver units. We'll cover cleaning frequency, troubleshooting, and specific product issues, including the common flawless razor battery question.
This section aims to be your quick-reference for all things related to shaver maintenance. Getting answers to these questions is part of becoming an expert on how to clean electric shaver systems. Let's resolve your final doubts about how to clean electric shaver care.
8.1 How Often Should I Clean My Electric Shaver?
This is the most common question, and the answer depends on your usage. Here’s a simple schedule to follow. Adhering to this is the easiest way to master how to clean electric shaver maintenance.
| Usage Frequency | Quick Clean (Rinse/Tap) | Deep Clean (Soap/Disinfect) | Replace Head |
|---|---|---|---|
| Daily Use | ✅ After Every Shave | ✅ Once a Week | 12-18 Months |
| 3-4 Times/Week | ✅ After Every Shave | ✅ Every 2 Weeks | 18 Months |
| Occasional Use | ✅ After Every Shave | ✅ Once a Month | 24 Months |
8.2 What If My Shave Is Still Poor After Cleaning?
If you've followed all the how to clean electric shaver steps and your shave is still not close or comfortable, it's almost certainly time to replace the cutting head. The blades and foils wear out over time. Even with perfect cleaning, they won't last forever.
Most manufacturers recommend replacement every 12 to 18 months. This is the final step in troubleshooting performance issues.
8.3 Is an Automatic Cleaning Station Really Necessary?
Automatic cleaning stations are convenient but not essential. They perform the how to clean electric shaver process for you, and also dry and charge the device. However, you can achieve the exact same level of cleanliness manually with soap, water, and lubricant for a fraction of the long-term cost of refill cartridges.
The choice comes down to convenience versus cost.
| Feature | Manual Cleaning | Automatic Station |
|---|---|---|
| Upfront Cost | ✅ Low | ❌ High |
| Ongoing Cost | ✅ Very Low | ❌ Moderate (Cartridges) |
| Convenience | ❌ Requires Effort | ✅ One-Touch Operation |
| Cleaning Quality | ✅ Excellent (If Done Right) | ✅ Consistent & Excellent |
8.4 How Do I Handle a Flawless Razor Battery Change?
The Finishing Touch Flawless razor is a popular choice, but its battery will eventually need replacing. The flawless battery change is simple. First, remove the protective cap. Then, firmly grip the top and bottom halves of the unit and twist them in opposite directions to separate them.
It requires a firm twist, not a pull. The old AA battery can then be removed. When inserting the new one (a turbo cell battery for flawless models is a good choice), ensure the positive (+) end faces down into the unit.
Then, just twist the two halves back together. This is a common flawless shaver battery issue that is easily solved.
9. Your Electric Shaver Maintenance Checklist
To make things even easier, here is a simple, actionable checklist. You can use this to build a consistent habit and take the guesswork out of how to clean electric shaver components. Following this checklist is the most practical way to maintain electric grooming tools for peak performance and longevity.
This is your roadmap to perfect shaver care and a key part of the how to clean electric shaver system.
9.1 After Every Shave (30 Seconds)
- Turn off the shaver.
- Remove the shaving head.
- Gently tap out the loose hair clippings.
- If your shaver is waterproof, give the head a quick rinse under warm water.
- Shake off excess water and let it air dry.
9.2 Once a Week (5 Minutes)
- Perform a full wet clean with liquid soap as described in sections 3 or 4.
- Visually inspect the foil or rotary combs for any signs of damage.
- After drying, apply one drop of lubricant to the cutting elements.
- Briefly turn the shaver on to distribute the oil evenly.
- This weekly routine is essential for keeping your clean electric razor blades in top condition.
9.3 Once a Month (10 Minutes, Rotary Shavers Only)
- Perform a full disassembly of the rotary shaving head.
- Clean each cutter and comb individually.
- Remember to keep the cutter and comb pairs together.
- Use a disinfectant spray or alcohol to sanitize the parts.
- This is the most advanced step in the how to clean electric shaver process for rotary users.
9.4 Once a Year
- Honestly assess your shave quality. Is it taking longer? Is it less comfortable?
- If so, it's time to purchase and install a new replacement head.
- Mark the date in your calendar for the next annual check.
10. Beyond Cleaning: What is the Ultimate Goal of How to Get a Clean Shave?
Learning how to clean electric shaver units is a means to an end. The ultimate goal is to achieve a perfectly smooth, comfortable shave that leaves you looking and feeling your best. A cleanly shaven face is more than just the absence of hair; it's a statement of confidence and professionalism.
This section connects the practical steps of cleaning to the emotional and psychological benefits of a great shave. This is the 'why' behind mastering how to clean electric shaver techniques. The journey to how to get a clean shave is about more than just the tools.
10.1 The Psychology Behind a Cleanly Shaven Face
A clean shave face has a powerful psychological impact. Studies have shown that a well-groomed appearance is often associated with traits like professionalism, trustworthiness, and attention to detail. Research indicates that men with a cleanly shaven face are perceived more positively in job interviews.
When you look your best, you feel more confident, and that confidence radiates in your personal and professional interactions. The effort you put into learning how to clean electric shaver parts pays off in how you present yourself to the world.
10.2 Before You Shave My Beard, Wouldn't You Like a Preview?
Here's an interesting thought. You've learned all about how to clean electric shaver heads to get the perfect shave. But what will that perfect shave actually look like on you? If you've worn a beard for a while, you might be curious about the face underneath.
What if you could see the result before you even turn your shaver on? This question bridges the gap between the desire to shave my beard and the final outcome, removing any uncertainty.
10.3 The Final Piece of the Puzzle: How to Get a Clean Shave
Achieving the perfect shave is a combination of three things: the right technique, a well-maintained tool, and a clear vision of your desired result. You've now learned the most critical part of tool maintenance: how to clean electric shaver systems. You know the techniques for your specific shaver type.
The only piece missing is that visual confirmation, the confidence to know that the effort will be worth it. This is the final step in your journey to how to get a clean shave.
11. Master How to Clean Electric Shaver and Start Your Perfect Shave Journey
By now, you are an expert on how to clean electric shaver devices. You know the difference between cleaning a foil and a rotary shaver, the special considerations for sensitive skin and head shaving, and even how to handle a flawless razor battery replacement. You understand that a clean shaver is the foundation for a perfect clean shave face.
This knowledge is the key to unlocking a better grooming experience. The process of how to clean electric shaver heads is no longer a mystery. You have all the information you need to properly maintain electric grooming tools.
Now, you can confidently perform every step of the how to clean electric shaver process.
But before you put this knowledge into practice, why not satisfy your curiosity? Our innovative AI tool at beardremover.com can show you what you'll look like with a perfectly clean shave in seconds. Just upload a photo and see the transformation for yourself. It’s a fun, free way to preview your new look and get the motivation to stick with your new, expert grooming routine.
See your future cleanly shaven face today! This is the ultimate reward for learning how to clean electric shaver components so well. Don't wait to discover the best version of yourself. The journey starts with knowing how to clean electric shaver heads, and ends with a new you.
Follow this complete clean shave and aftercare guide to upgrade your shaving prep, technique, and post-shave routine, finally saying goodbye to razor burn, bumps, and stubborn 5 o’clock shadow.
https://beardremover.com/en/clean-shave-aftercare