How to Fade Your Beard at Home: The Ultimate 2026 Guide for a Flawless Look
Published in 2026-03-28
Staring at your reflection, you see the problem: an uneven, messy beard that screams for a barber’s touch. But the thought of another expensive visit, or worse, a DIY disaster, holds you back. You're not alone. Many men face the challenge of achieving that clean, sharp look at home, fearing the dreaded slip of the clippers that could undo months of growth.
This guide is your solution. We'll walk you through everything you need to know about how to fade my beard, from the essential tools to the pro techniques. Forget the guesswork and the anxiety. By the end of this beard fade tutorial, you'll have the confidence to tackle any style, whether it's a subtle taper beard sideburns look, a sharp beard fade neckline guide, or a complete hair and beard fade.
We'll even show you what to do if things go wrong. Get ready to master the art of the perfect how to fade my beard and take control of your style. This is the ultimate guide on how to fade my beard.

1. Understanding the Beard Fade and Why You Need It
1.1 What Exactly is a Beard Fade?
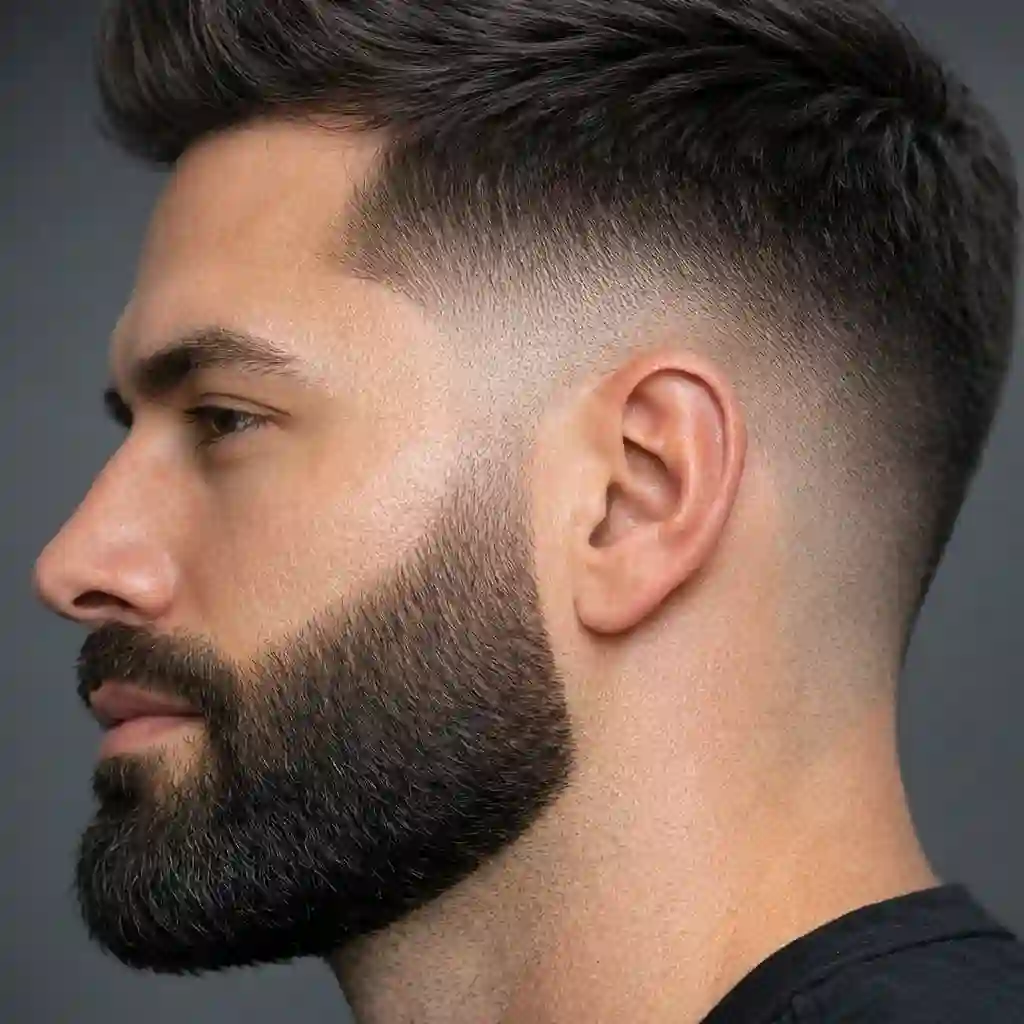
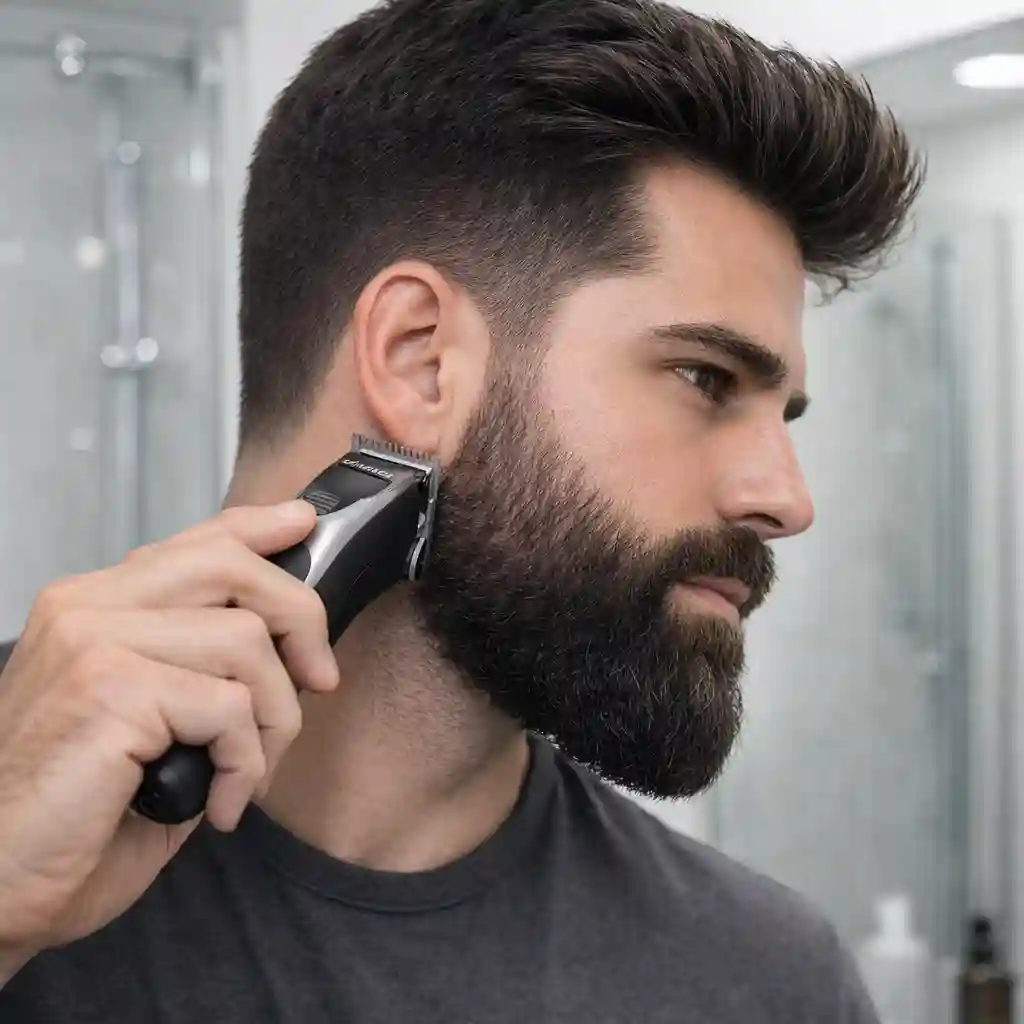
A beard fade is a grooming technique that creates a smooth, gradual transition from shorter to longer hair. This is typically done on the sideburns and neckline, blending the beard seamlessly with your skin or hairstyle. The goal of learning how to fade my beard is to eliminate any harsh lines, giving your beard a polished, three-dimensional look.
It’s a key skill for anyone serious about their grooming. Mastering how to fade my beard elevates your style from amateur to professional. This technique is fundamental to a sharp beard shave style and a polished overall look. Each beard shave style requires a slightly different approach to the fade.
For a deeper dive into different fade styles, check out this Reddit discussion where users share their preferences and tips on how to fade my beard:
1.2 The Benefits of Mastering ‘How to Fade My Beard’
Learning how to fade my beard offers numerous benefits. It enhances your facial structure, creating a more defined jawline and a cleaner overall appearance. A well-executed fade makes you look sharper and more put-together, which can boost your confidence.

Plus, mastering this skill at home saves you time and money on frequent barber visits. The ability to properly execute a how to fade my beard is a game-changer for your grooming routine. It's a crucial step in any DIY beard fade steps.
1.3 Different Types of Beard Fades (Low, Mid, High, Skin Fade)
There are several types of beard fades to choose from, each offering a different look. A low fade starts just above the neckline, offering a subtle, classic style. A mid fade begins higher up, around the cheekbones, for a more defined look.
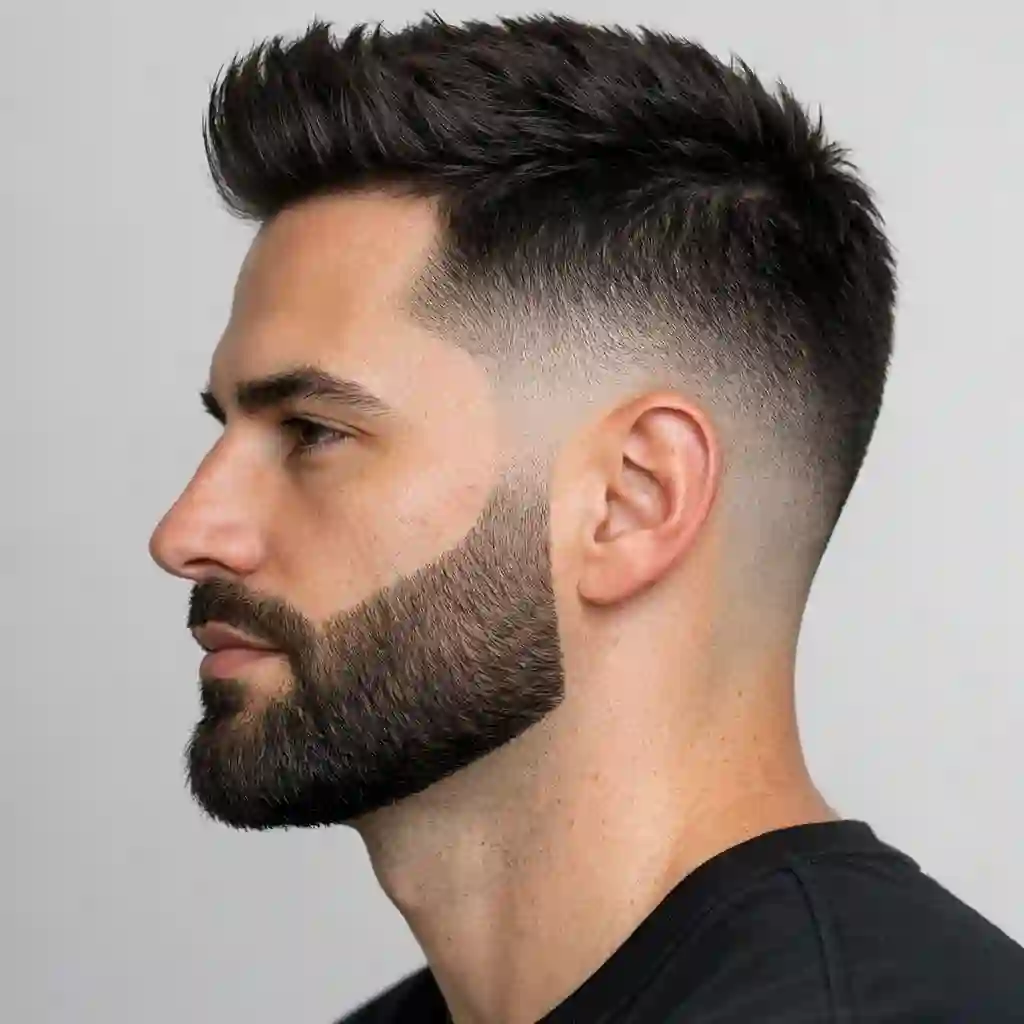
A high fade is the boldest option, starting at the temples for a sharp, modern edge. A skin fade, or bald fade, involves fading beard into skin for the cleanest possible finish. Understanding these options is the first step in your journey of learning how to fade my beard.
This beard fade tutorial will help you choose the right style for you. Knowing how to fade my beard in different styles gives you versatility.
2. The Essential Toolkit for a Perfect Beard Fade
2.1 Choosing the Right Clippers
To properly learn how to fade my beard, you need the right tools. A quality pair of clippers is non-negotiable. Look for a model with a powerful motor and a range of guard sizes. Cordless clippers offer more flexibility, but corded models often provide more consistent power.
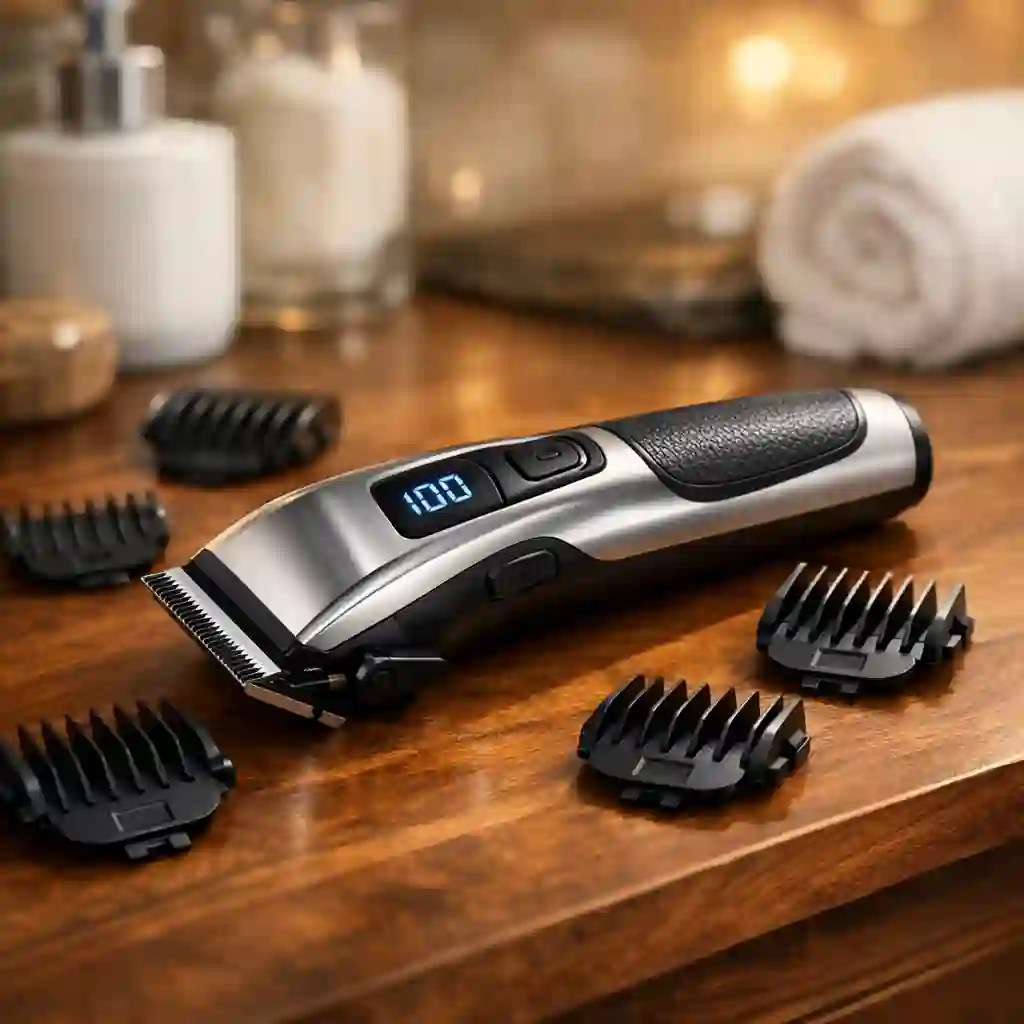
An adjustable taper lever is also a key feature, allowing for micro-adjustments between guard lengths. This is essential for a smooth blend. Investing in the best clippers for beard fade will make the process of how to fade my beard much easier.
Many facial hair shaver reviews can guide your purchase. Reading facial hair shaver reviews before buying is always a smart move.
This YouTube video provides an excellent overview of the best clippers for the job, a key part of learning how to fade my beard:
Best clippers for beard fade video
YouTube
2.2 Understanding Your Guards (Combs)
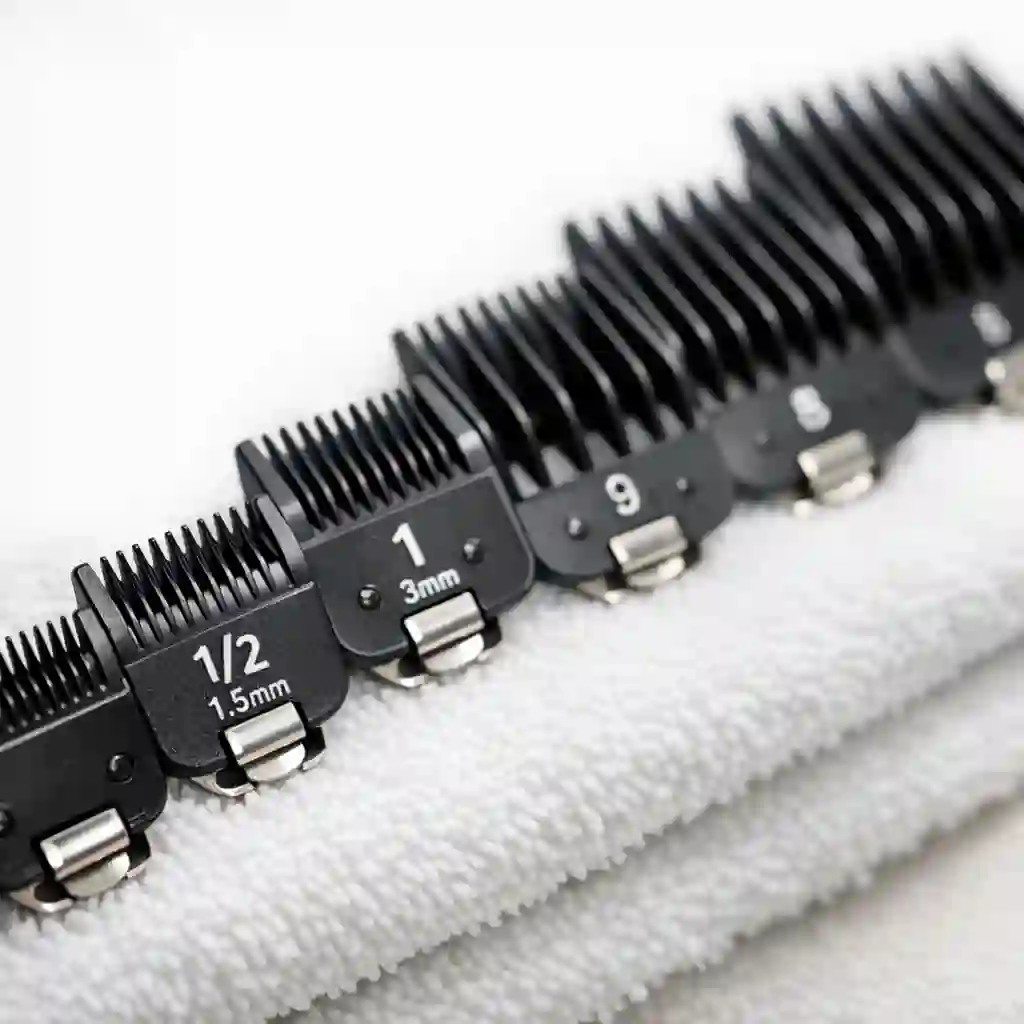
Clipper guards, or combs, are the secret to a successful fade. They come in various sizes, typically numbered from #0 (shortest) to #8 (longest). Each number corresponds to a specific hair length. To achieve a fade, you'll work your way through the guards, starting with a longer one and gradually moving to shorter ones.
This systematic approach is the foundation of learning how to fade my beard. A good beard fade tutorial will always emphasize the importance of using guards correctly. This is a critical part of how to fade my beard.
A user on Quora breaks down the guard system in a simple way, which is helpful for anyone learning how to fade my beard:
2.3 The Supporting Cast: Trimmer, Scissors, and Comb
While clippers do the heavy lifting, a few other tools are essential for a polished look. A smaller, more detailed trimmer is perfect for creating sharp lines around the neckline and cheeks. A pair of grooming scissors is useful for snipping away any stray hairs.
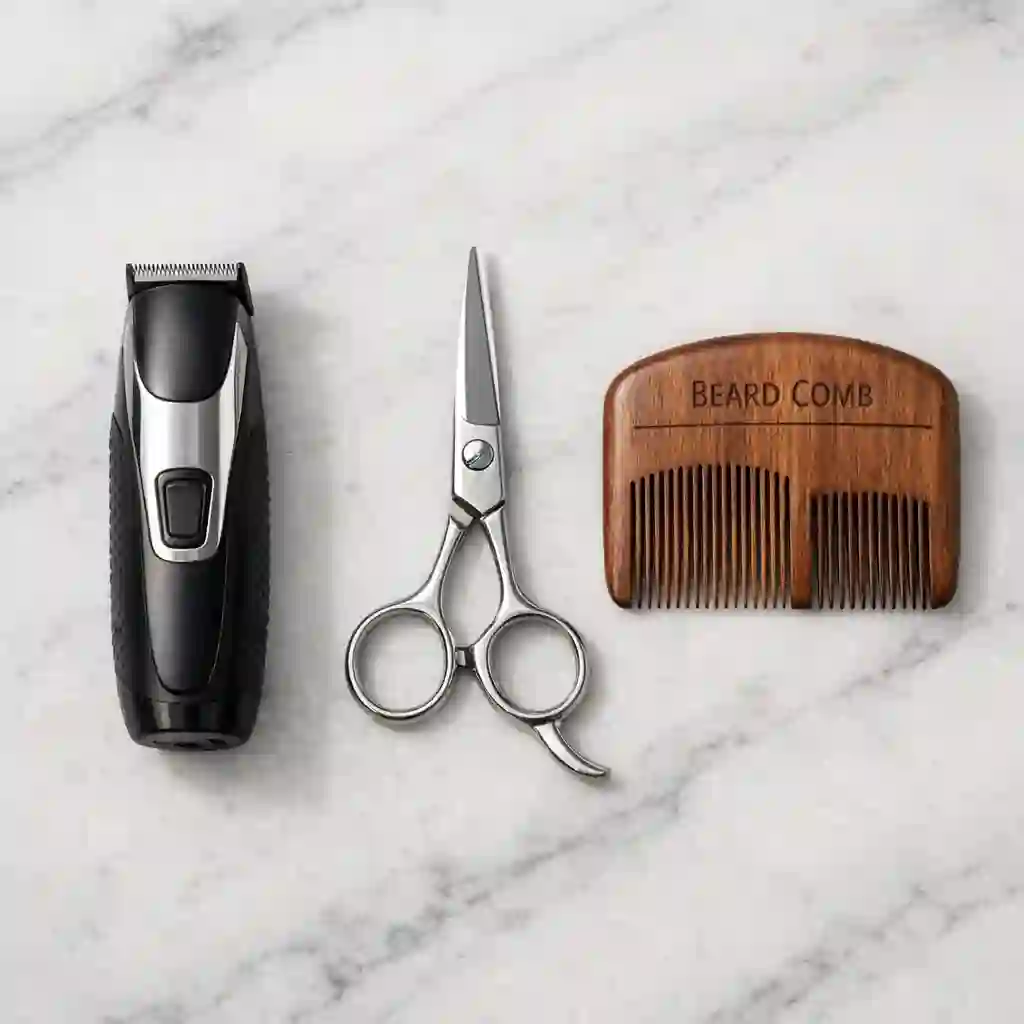
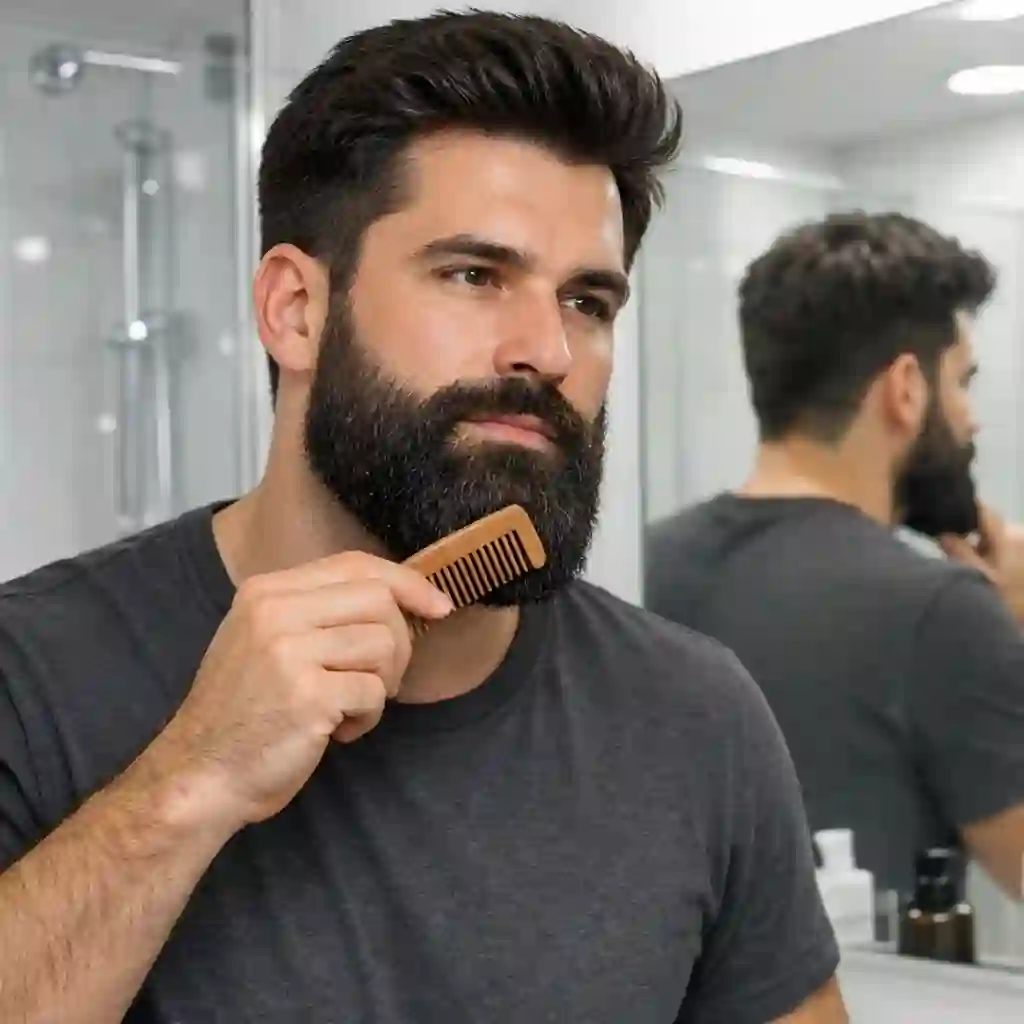
And a good beard comb is crucial for detangling and styling your beard before and after the fade. These tools are indispensable when you're learning how to fade my beard. They complete your toolkit for mastering how to fade my beard.
2.4 Pre-Fade Prep: Beard Wash and Conditioner
Never attempt to fade a dirty or wet beard. Start by washing your beard with a quality beard wash and conditioner. This will soften the hairs and make them easier to cut. A clean, dry beard provides the perfect canvas for a smooth, even fade.
This preparation is a vital first step in any guide on how to fade my beard. Proper prep is key to a successful how to fade my beard.
3. The 5-Step Blueprint to Fade Your Beard Like a Pro
3.1 Step 1: Prep Your Canvas
Before you start, make sure your beard is clean, completely dry, and combed through. This ensures an even cut and prevents the clippers from snagging. This is the first and most crucial of the DIY beard fade steps.
A clean start is essential for a great how to fade my beard result. Don't skip this step when learning how to fade my beard.
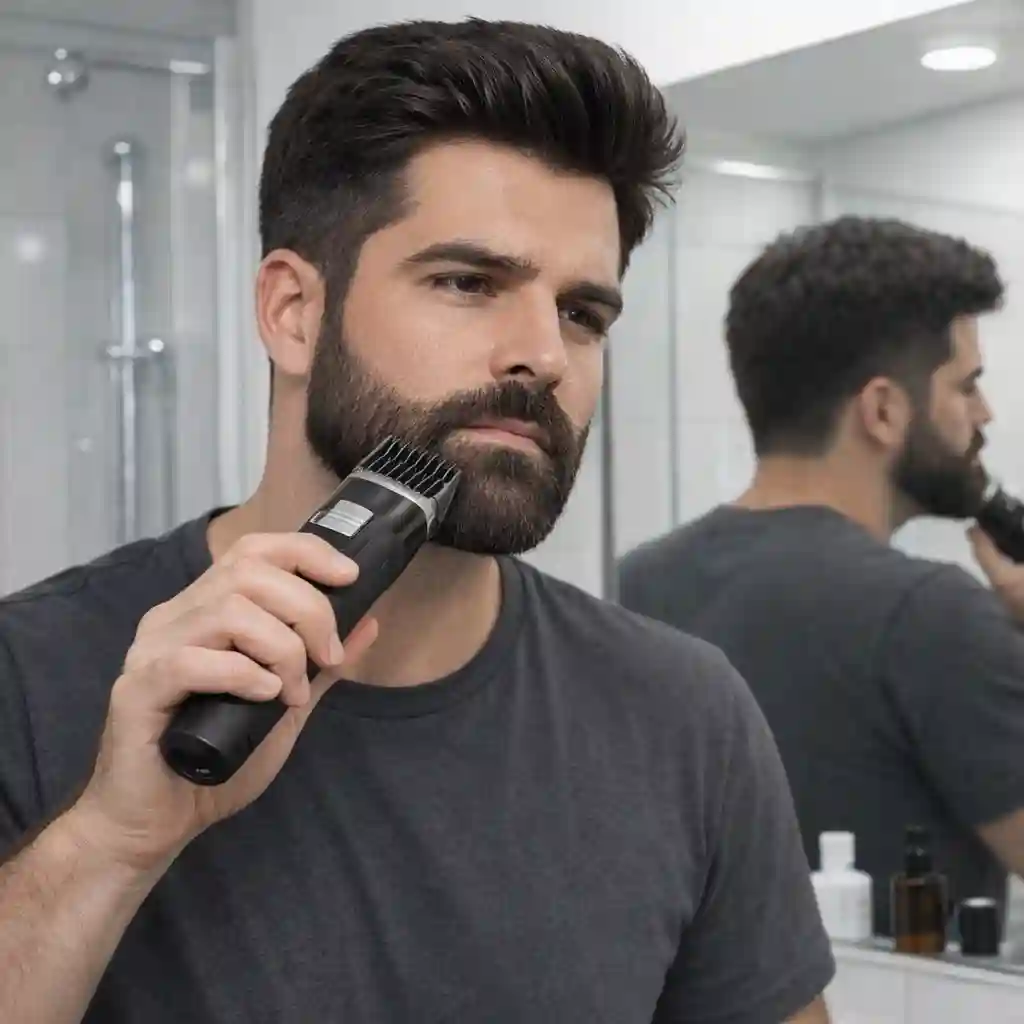
3.2 Step 2: Establish Your Longest Length
Begin by attaching a longer guard to your clippers, such as a #4. Trim your entire beard to this length. This creates a uniform base to work from and sets the overall length of your beard. This step is about establishing control before you begin the intricate process of how to fade my beard.
This is a safe starting point for any how to fade my beard attempt.
This TikTok video shows a quick and easy way to establish your initial length, a great visual for your how to fade my beard journey:
Easy beard length setting
TikTok
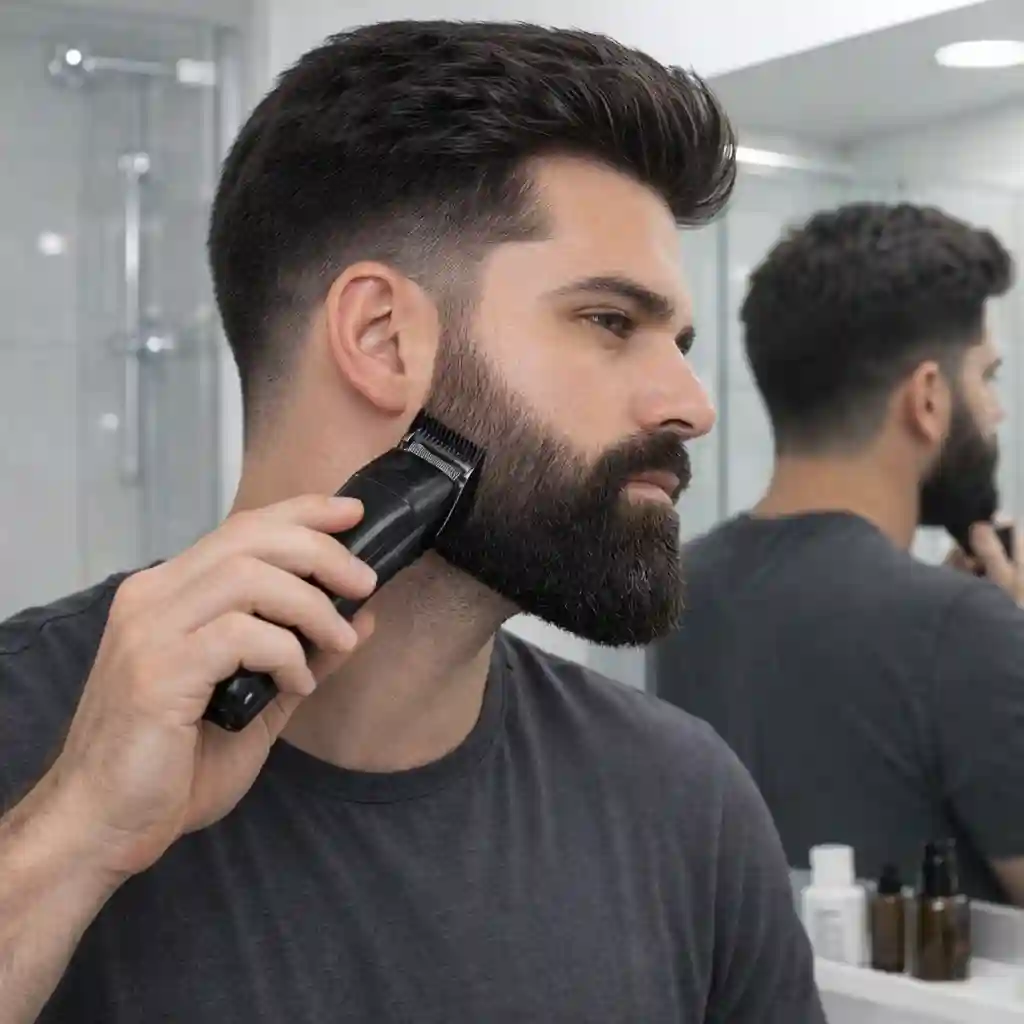
3.3 Step 3: The Art of the Fade - Guard-by-Guard Method
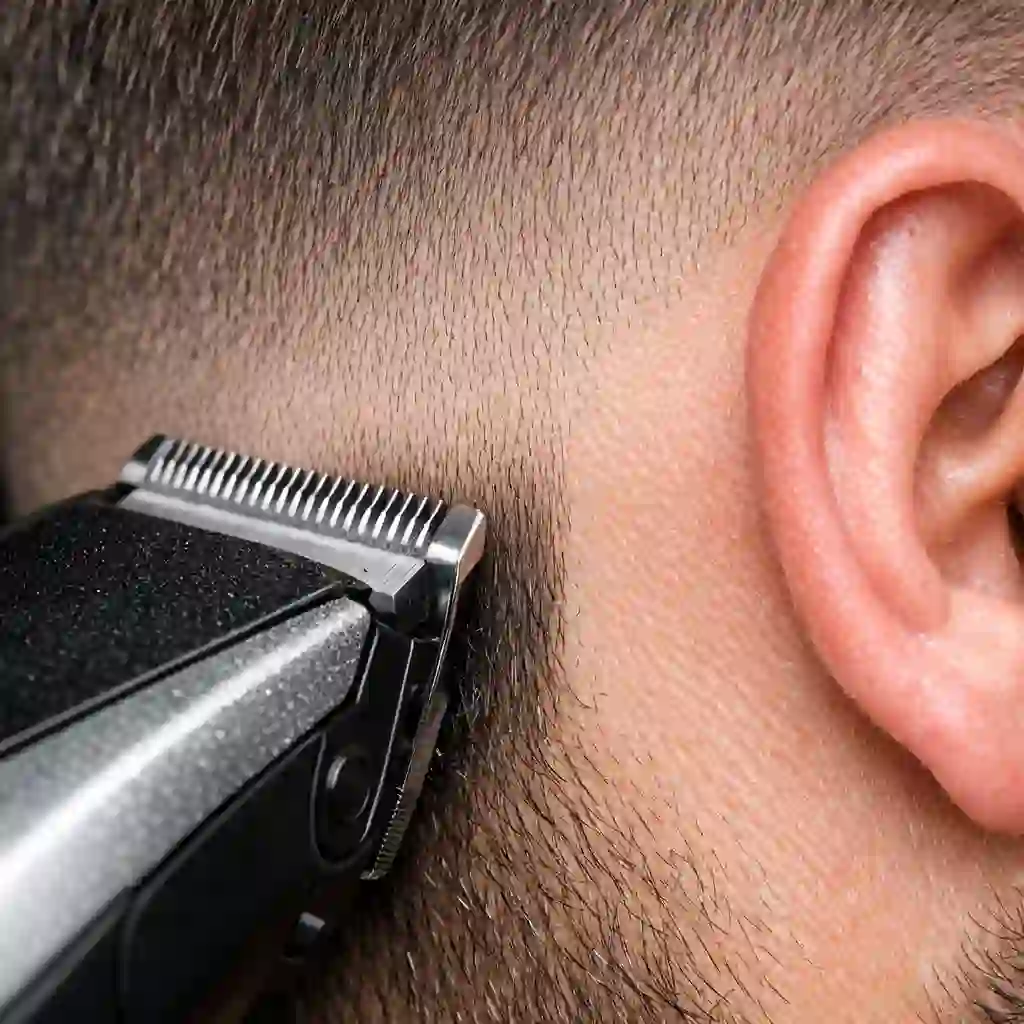
Now, it’s time to create the fade. Switch to the next guard down (e.g., a #3). Start at your sideburns and trim up to about the middle of your ear. Then, switch to an even shorter guard (e.g., a #2) and trim from the bottom of your sideburns up to where you stopped with the #3.
Repeat this process with progressively shorter guards as you move up the sideburn. This methodical approach is the core of how to fade my beard. This is the most detailed part of the how to fade my beard process.
3.4 Step 4: The ‘Flicking’ Motion to Erase Lines
As you create the fade, you may notice faint lines between the different guard lengths. To eliminate these, use a “flicking” or “scooping” motion with your clippers. As you move the clippers up into the longer section, flick your wrist outward, away from your face.
This blends the two lengths together seamlessly. This technique is what separates an amateur from a pro when it comes to how to fade my beard. Mastering this is key to a smooth how to fade my beard.
3.5 Step 5: Clipper-Over-Comb for Ultimate Control
For an even more precise blend, you can use the clipper-over-comb technique. This is an advanced move, but it offers incredible control. Place a comb in your beard at the transition point, angled slightly outward. Then, run the clippers (without a guard) over the comb, cutting only the hair that pokes through.
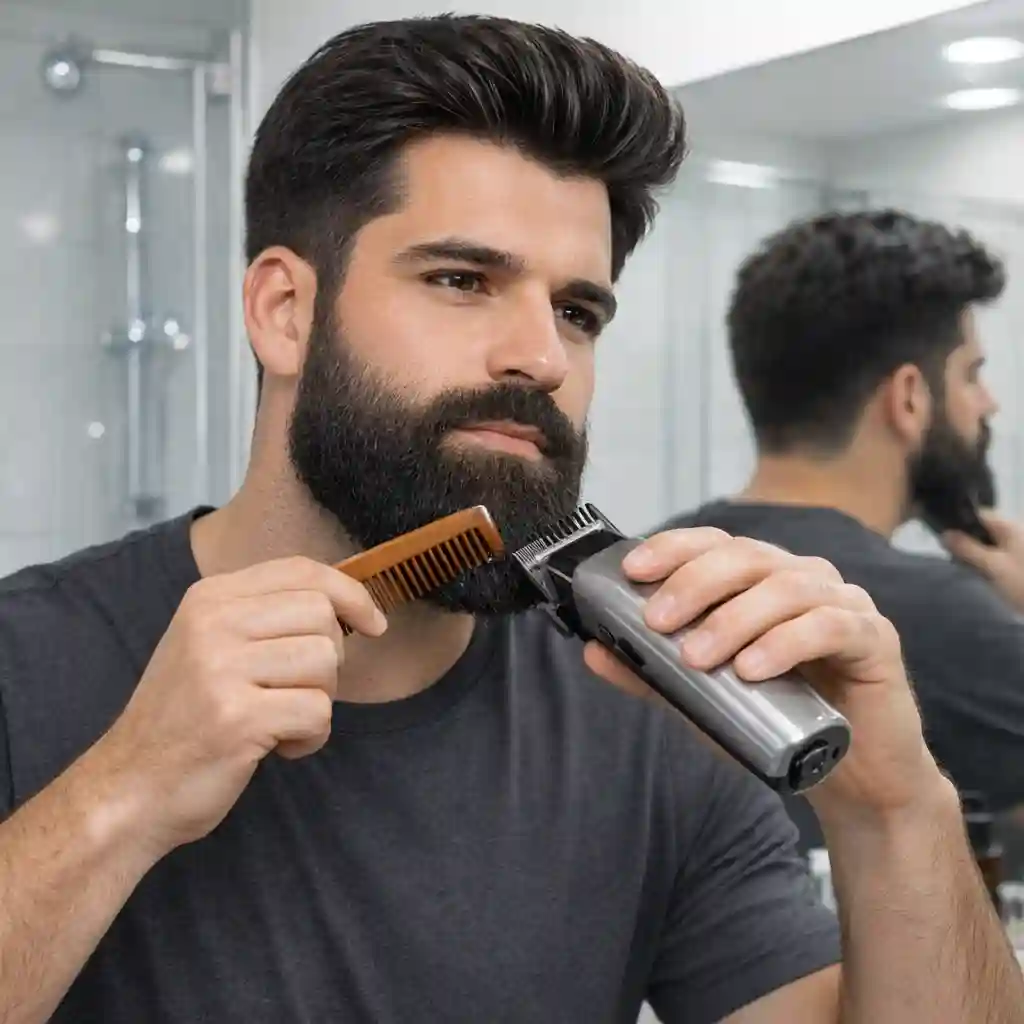
This is a fantastic way to refine your how to fade my beard. This technique gives you ultimate control over your how to fade my beard. It's the most advanced method in any how to fade my beard guide.
4. Mastering the Neckline: The Foundation of a Clean Look
4.1 Where to Draw the Line? The Two-Finger Rule
A clean neckline is crucial for a sharp-looking beard. A common mistake is trimming the neckline too high. To find the right spot, use the “two-finger rule.” Place your index and middle fingers together on your neck, with the top finger just above your Adam’s apple.
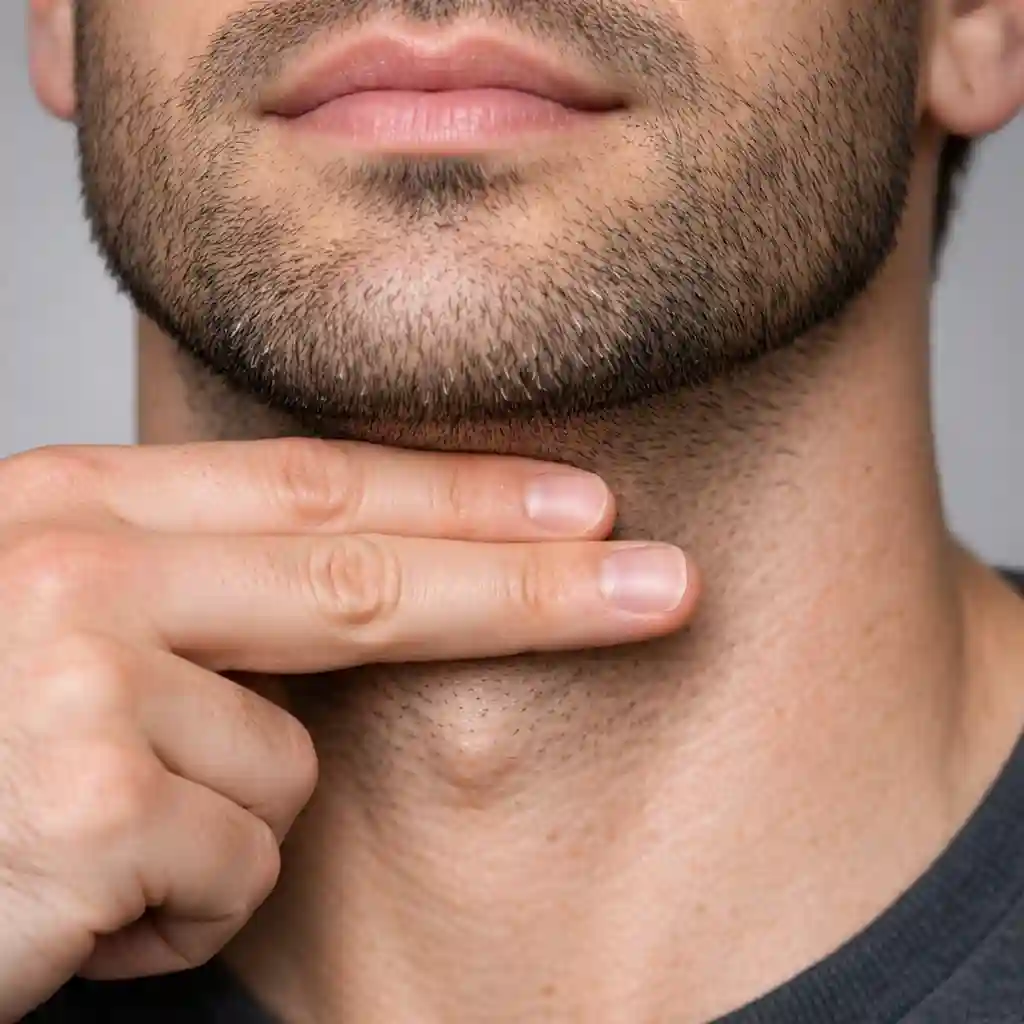
The line right above your top finger is where your neckline should be. This beard fade neckline guide is a simple but effective trick for a perfect how to fade my beard.
4.2 Carving a Crisp Neckline
Once you’ve determined the line, use your trimmer to create a clean, defined edge. You can opt for a rounded or a more squared-off shape, depending on your preference. Shave everything below this line.
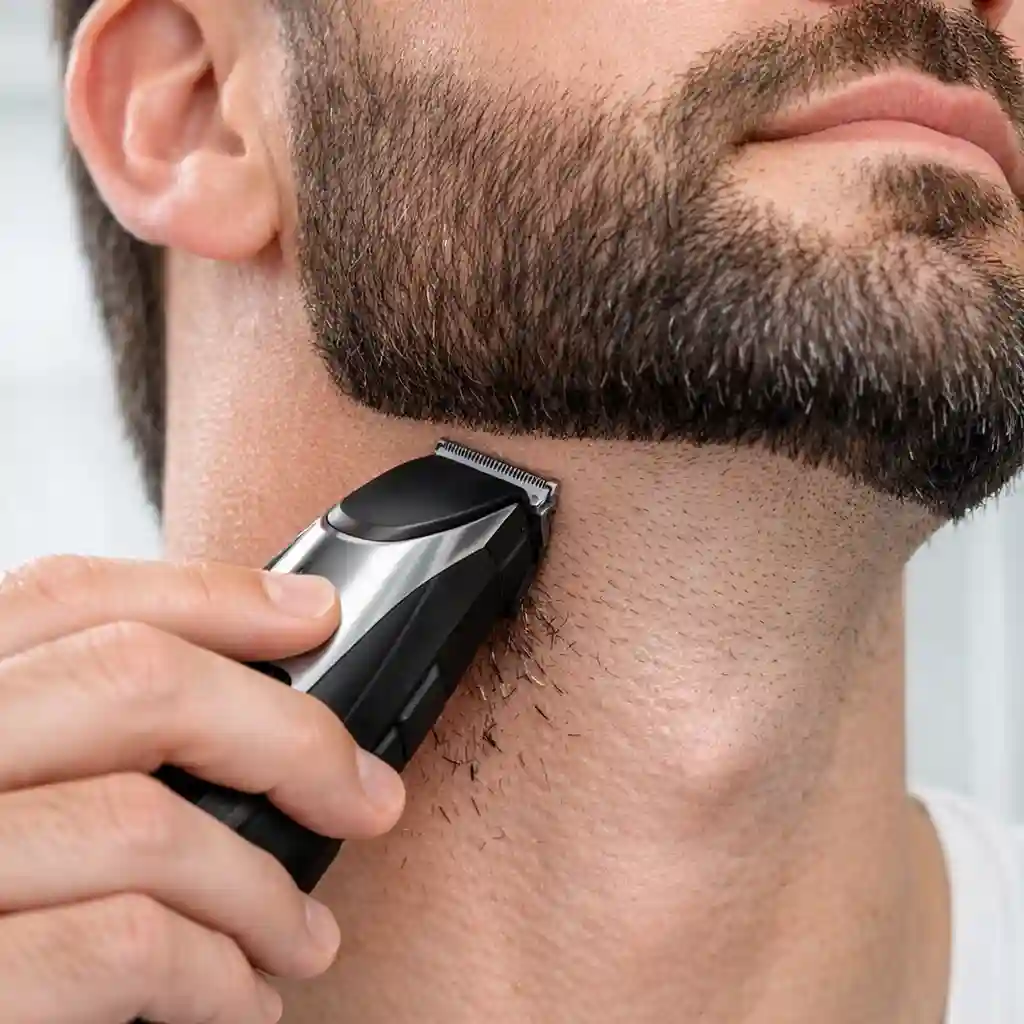
A crisp neckline is a hallmark of a well-executed how to fade my beard. This step is essential for a clean how to fade my beard.
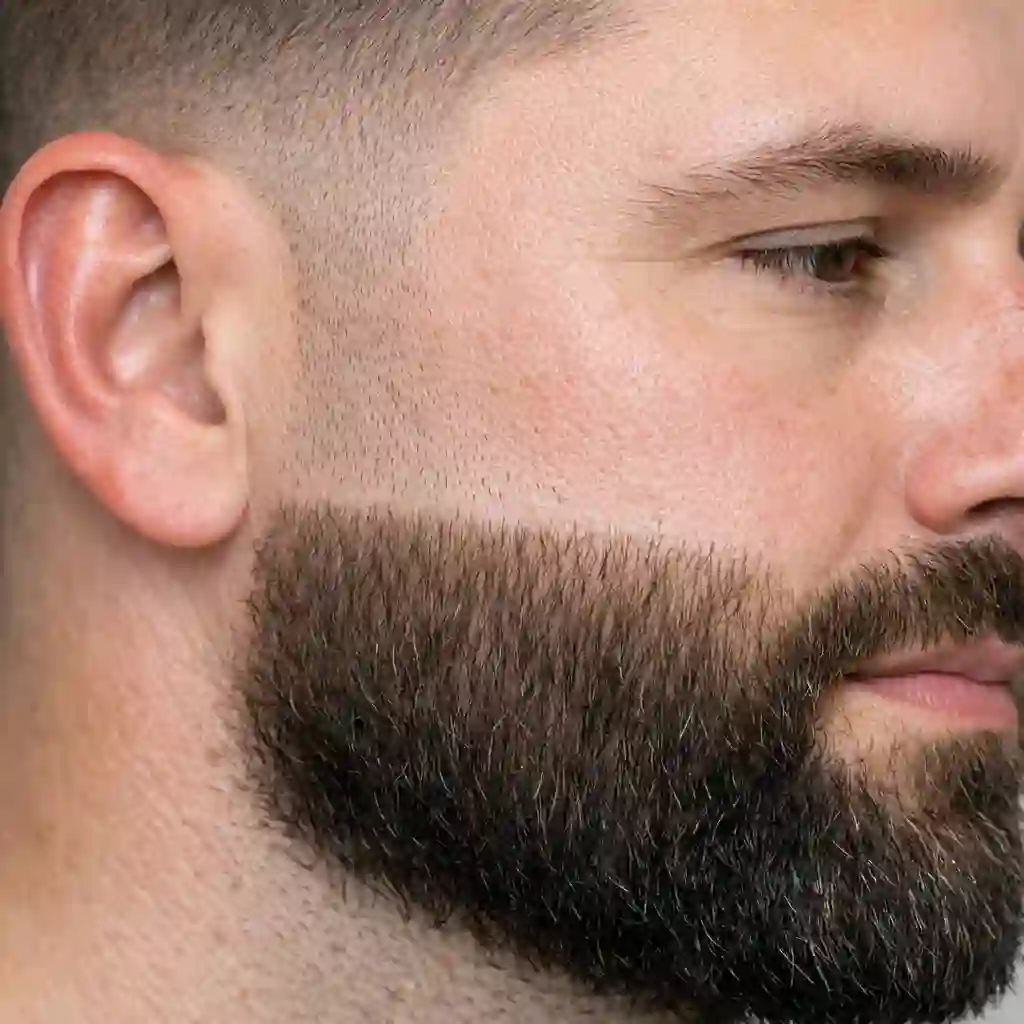
4.3 Fading the Neckline for a Natural Finish
For a more natural look, you can also fade your neckline. This involves tapering the hair from the defined line up into the fuller part of your beard. Use the same guard-by-guard and flicking techniques you used on your sideburns.
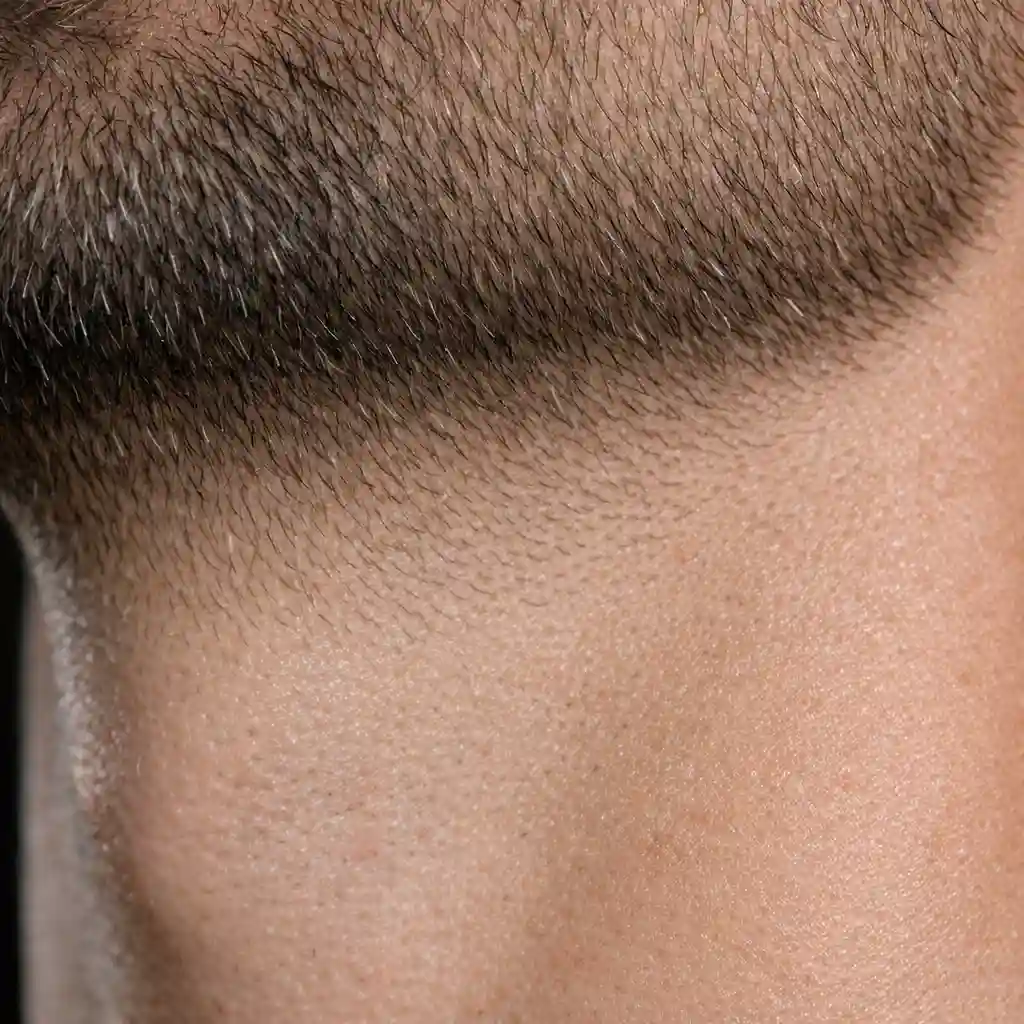
This creates a soft, blended finish, avoiding a harsh line. This is an advanced technique for how to fade my beard. A faded neckline enhances the overall look of your how to fade my beard.
5. Tapering the Sideburns: Bridging Hair and Beard
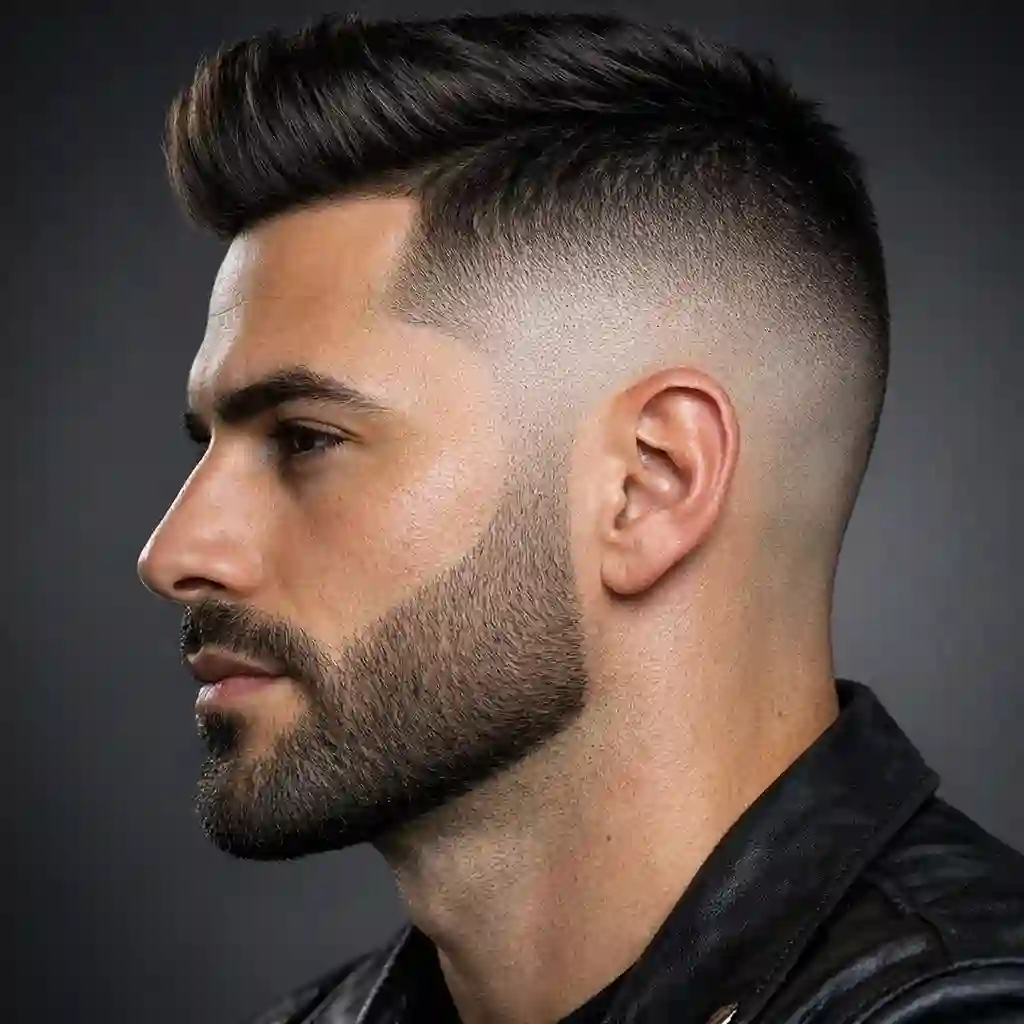
5.1 The Goal: A Seamless Transition
Your sideburns are the bridge between your haircut and your beard. The goal is to create a seamless, uninterrupted flow from one to the other. A sloppy sideburn area can ruin an otherwise great haircut and beard.
This is where the taper beard sideburns technique comes in. A smooth transition is key to a successful how to fade my beard.
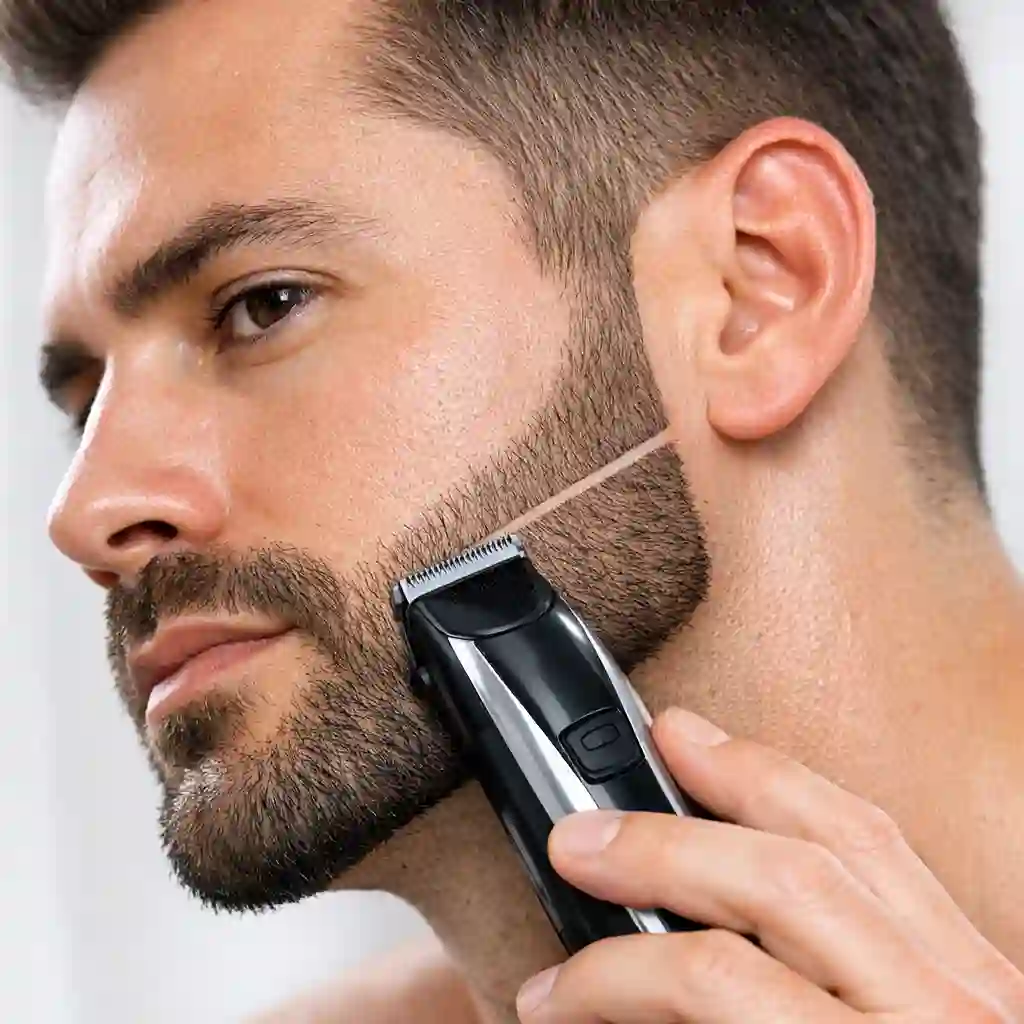
5.2 Step-by-Step Sideburn Tapering
To taper your sideburns, start with a shorter guard at the top of your sideburn, where it meets your hair. Gradually increase the guard length as you move down toward the fuller part of your beard. This creates a smooth hair and beard fade.
This process is a miniature version of the main how to fade my beard technique. This is a crucial part of the how to fade my beard process. Think of it as fading beard into skin in a controlled, gradual way.
5.3 Tips for Different Hairstyles
The way you taper your sideburns will depend on your hairstyle. If you have a fade haircut, you’ll want to blend the sideburns directly into the fade. If you have longer hair, you’ll need to create a more gradual taper to avoid a disconnected look.
The goal is always a smooth, natural transition. This is an important consideration for your how to fade my beard style.
6. The Art of the Stubble: How to Maintain a Perfect Scruff
6.1 Why Stubble is a Timeless Style
Stubble, or a short scruff, is a classic, rugged look that’s always in style. It’s a great option for men who don’t want a full beard but still want some facial hair. The key to a great stubble look is maintenance.

Knowing how to maintain stubble beard is just as important as knowing how to fade my beard. Proper how to maintain stubble beard habits keep your look sharp every day. A well-kept stubble is a stylish choice.
6.2 Finding Your Ideal Stubble Length
The perfect stubble length is a matter of personal preference, but it’s typically between 1mm and 3mm. Use your clippers with a short guard to find the length that works best for you. You want it to be long enough to be visible, but short enough to look intentional.
This is a simple way to start your journey with facial hair before attempting a full how to fade my beard.
6.3 The Maintenance Routine
To maintain your stubble, you’ll need to trim it every 2-3 days. This will keep it at a consistent length and prevent it from looking unkempt. You’ll also need to maintain a clean neckline and cheek line.
The process of how to maintain a stubble beard is less involved than a full fade, but it still requires regular attention. This is a simpler alternative to a full how to fade my beard.
7. Post-Fade Care: Soothe Skin & Nourish Your Beard
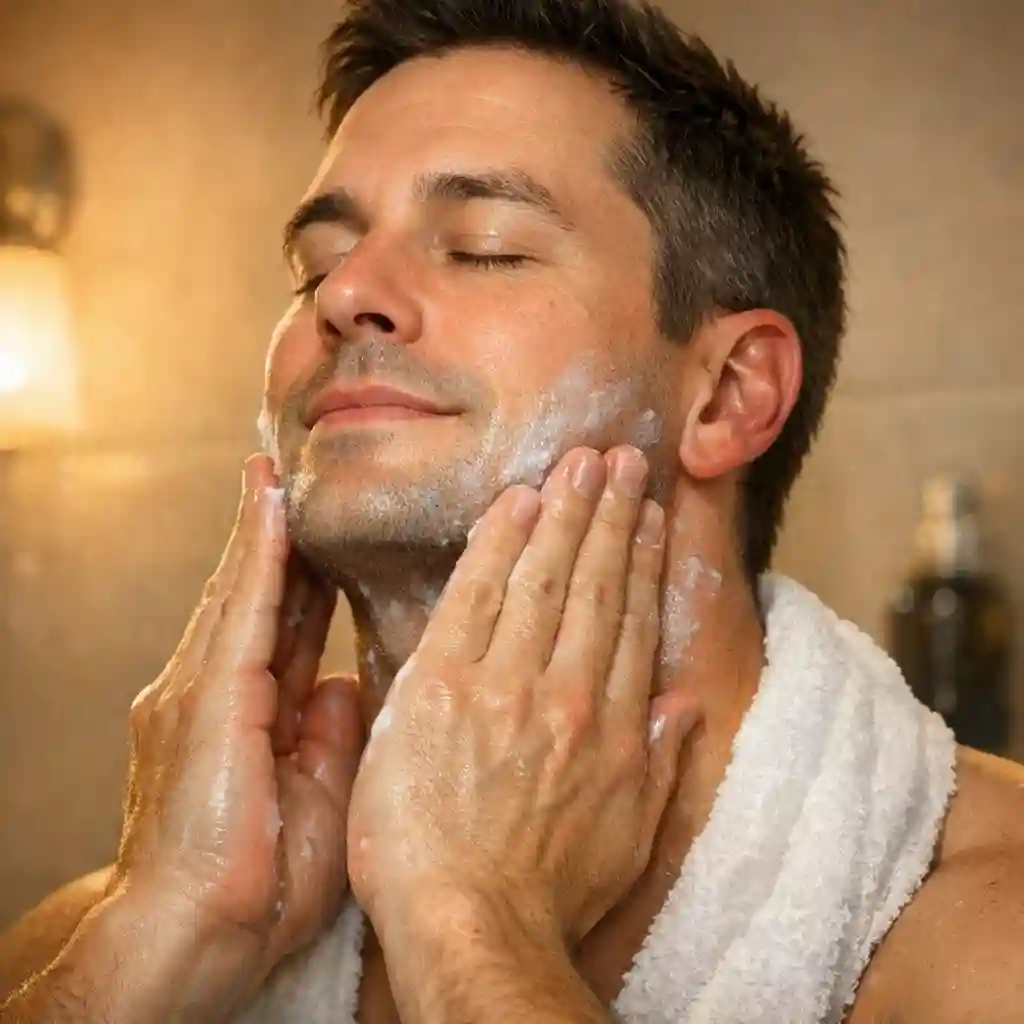
7.1 The Importance of Aftershave Balm
After you’ve finished your fade, your skin may be a bit irritated. An aftershave balm is essential for soothing and hydrating your skin. Look for a balm with natural ingredients like aloe vera and shea butter.
Knowing how to use aftershave balm is a crucial part of the post-fade routine. This is an often-overlooked step in the how to fade my beard process.
7.2 How to Use Aftershave Balm Correctly
To use aftershave balm, take a small, dime-sized amount and rub it between your hands. Gently massage it into the skin on your neck and cheeks, or wherever you’ve shaved. This will help to reduce redness and prevent razor burn.
This is a simple but effective way to care for your skin after a how to fade my beard.
7.3 Daily Hydration with Beard Oil or Balm
To keep your beard looking its best, daily hydration is key. Use a quality beard oil or balm to moisturize your beard and the skin underneath. This will keep your beard soft, healthy, and manageable.
This is an essential part of any grooming routine, especially after a how to fade my beard.
8. Oops! How to Fix Common Beard Fade Mistakes
8.1 Mistake #1: You Created a Hard Line
One of the most common mistakes when learning how to fade my beard is creating a hard, visible line between the different lengths. If this happens, don’t panic. You can fix it by going back over the line with a shorter guard and using the flicking motion to blend it out.
This is a common hurdle in the how to fade my beard journey.
8.2 Mistake #2: The Fade is Uneven or Asymmetrical
Achieving a perfectly symmetrical fade is tricky. If you find that one side is shorter than the other, the best approach is to slowly and carefully trim the longer side to match. It’s always better to take off a little at a time.

This is a frustrating but fixable mistake when learning how to fade my beard.
This Reddit thread offers reassurance and practical advice from users who have made similar mistakes:
8.3 Mistake #3: You Took Off Too Much (The Patch)
This is the mistake everyone fears: accidentally creating a bald patch in your beard. If this happens, the best thing to do is to stop trimming and let it grow back. You can try to blend the area around the patch to make it less noticeable, but time is the only real solution.
This is a tough lesson in the process of learning how to fade my beard.
8.4 The Golden Rule: Start Long, Go Slow
To avoid these mistakes, always remember the golden rule of beard trimming: start with a longer guard and go slow. You can always take more hair off, but you can’t put it back on. Patience is your best friend when you’re learning how to fade my beard.
This is the most important rule for a successful how to fade my beard.
| Common Mistake | How to Fix It |
|---|---|
| ❌ Hard Lines | Use a shorter guard and a flicking motion to blend. |
| ❌ Uneven Sides | Slowly trim the longer side to match the shorter side. |
| ❌ Bald Patch | Stop trimming and let it grow back. |
| Do's and Don'ts of Fading | ✅ Do | ❌ Don't |
|---|---|---|
| Preparation | Start with a clean, dry beard. | Trim a wet or dirty beard. |
| Technique | Use a flicking motion to blend. | Create hard, visible lines. |
| Patience | Go slow and take your time. | Rush the process. |
9. Beyond the Fade: Advanced Beard Styling Techniques
9.1 Defining the Cheek Line
Once you've mastered how to fade my beard, you can take your grooming to the next level by defining your cheek line. A sharp, clean cheek line can dramatically enhance your facial features. The line should run from the top of your ear to the corner of your mouth.
Use your trimmer to create a crisp line, shaving everything above it. This adds a professional touch to your how to fade my beard style. A well-defined cheek line complements a perfect how to fade my beard. It's the final touch that makes your how to fade my beard truly stand out.
9.2 Shaping Your Mustache
Your mustache is a key component of your overall look. It should be neatly trimmed and shaped to complement your beard. Use grooming scissors to trim any long hairs that hang over your lip. You can also use a small amount of beard balm or wax to style it.
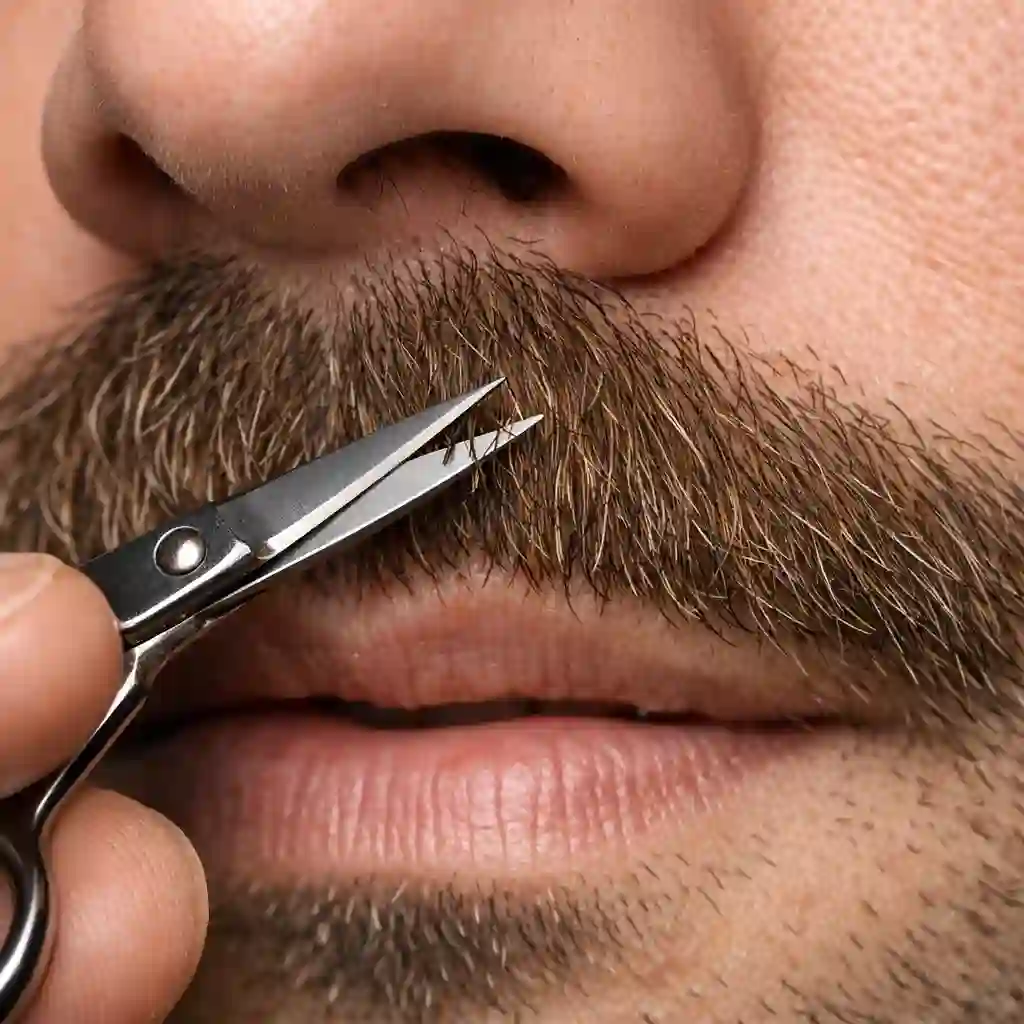
A well-groomed mustache is an important part of a complete how to fade my beard look. Don't neglect your mustache when learning how to fade my beard.
9.3 Using Scissors for Precision Work
While clippers are great for the bulk of the work, scissors are essential for precision detailing. Use them to snip away any stray, stubborn hairs that the clippers may have missed. Scissors are also great for shaping the fuller parts of your beard and for blending any tricky areas.
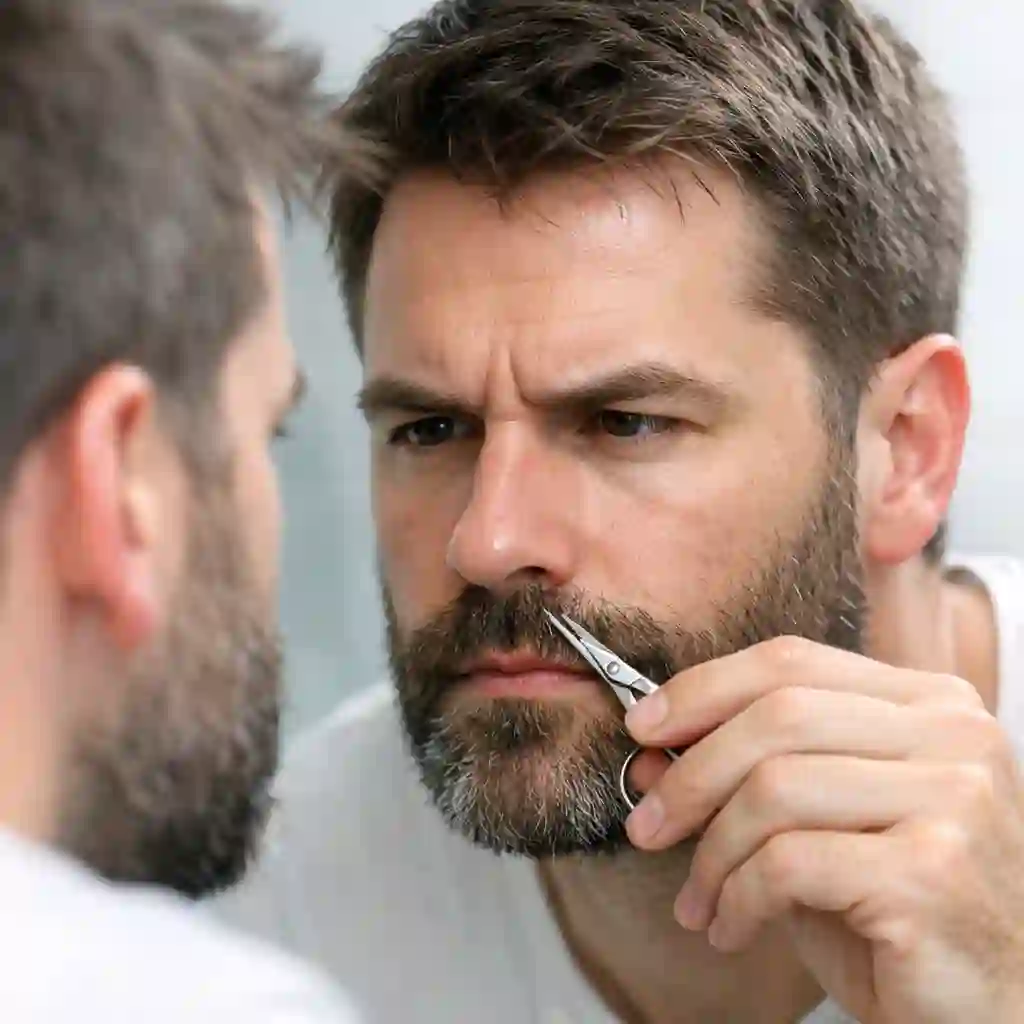
They are a valuable tool in your arsenal for achieving the perfect how to fade my beard. Scissors provide the finishing touch to your how to fade my beard. Use them every time you complete a how to fade my beard session.
10. Beard Fade FAQ: Your Questions Answered
10.1 How often should I fade my beard?
To keep your fade looking fresh, you should aim to touch it up every 1-2 weeks. The exact frequency will depend on how fast your hair grows and how sharp you want your fade to be. Regular maintenance is key to a consistently great-looking how to fade my beard.
Staying on top of your how to fade my beard routine is important.
10.2 Can I fade a curly or patchy beard?
Yes, you can absolutely fade a curly or patchy beard. For curly beards, it’s important to stretch the hair out as you trim to ensure an even cut. For patchy beards, a fade can actually help to make the patchiness less noticeable by blending the shorter areas with the fuller ones.
Learning how to fade my beard can be a great solution for patchy beards. A good how to fade my beard technique can work wonders.
10.3 What's the difference between a fade and a taper?
The terms “fade” and “taper” are often used interchangeably, but there is a subtle difference. A fade typically tapers down to the skin, creating a “bald” or “skin” fade. A taper, on the other hand, tapers down to a shorter length of hair, but not all the way down to the skin.
Both are great options when you're considering how to fade my beard. Understanding the difference can help you choose the right how to fade my beard style.
11.Conclusion & Your Secret Weapon: Fade with Confidence
You’ve made it. You now have all the knowledge and techniques you need to master how to fade my beard at home. From choosing the right tools to executing the perfect fade and even fixing mistakes, you’re ready to take control of your look. This guide has shown you the path to a flawless how to fade my beard.
Say goodbye to expensive barber visits and the fear of DIY disasters. The power to create a sharp, professional-looking beard is now in your hands. This is the essence of learning how to fade my beard.
But before you pick up those clippers, what if you could have a sneak peek? What if you could see what you’d look like without your beard, with zero risk or regret? Now you can. Visit us and upload a photo. Our revolutionary AI tool will instantly generate an image of you without your beard.
It’s the ultimate “try before you buy” for your face. Make your decision with confidence. See the future of your face, today. Then, you can truly decide on the best way for how to fade my beard.
If you want to see how handsome you look without a beard, or if you want to try on different types of beards, you might want to give this tool a try.
Build an at-home grooming routine with clear instructions on tools, necklines, cheek lines, and products so your beard stays neat, soft, and barbershop-level between professional trims.